ESP32 Cam + PlatformIO + VS Code
When you learn a new programming language, creating a “Hello World” as the first project is considered good practice. This involves displaying the words “Hello World” on the monitor.
Since microcontrollers usually do not have a screen for output, a blinking LED has established itself as the equivalent of “Hello World.”
The ESP32 Cam from AI Thinker features a built-in LED, intended to be used as a flash. We will now make this LED blink.
In this first ESP32 Cam tutorial, the focus is on understanding how to load code onto the ESP32 Cam from PlatformIO & VS Code. Therefore, the code example is kept very simple. In future articles, I will address more complex examples.
Prerequisites for this Tutorial
I assume that you have already programmed with the Arduino framework. Concepts such as how to make LEDs light up on a microcontroller should be familiar to you. That means you know what the setup() and loop() functions are for. Also, functions like pinMode(), digitalWrite(), and delay() should not be unfamiliar to you.
I also assume you have already installed PlatformIO and VS Code. If not, first look at my introductory article on PlatformIO and then return here.
In this tutorial, I use the ESP32 Cam model from AI Thinker. Additionally, I use an FTDI to establish the connection to the computer and some required jumper cables and a USB cable.
Connect ESP32 Cam via FTDI
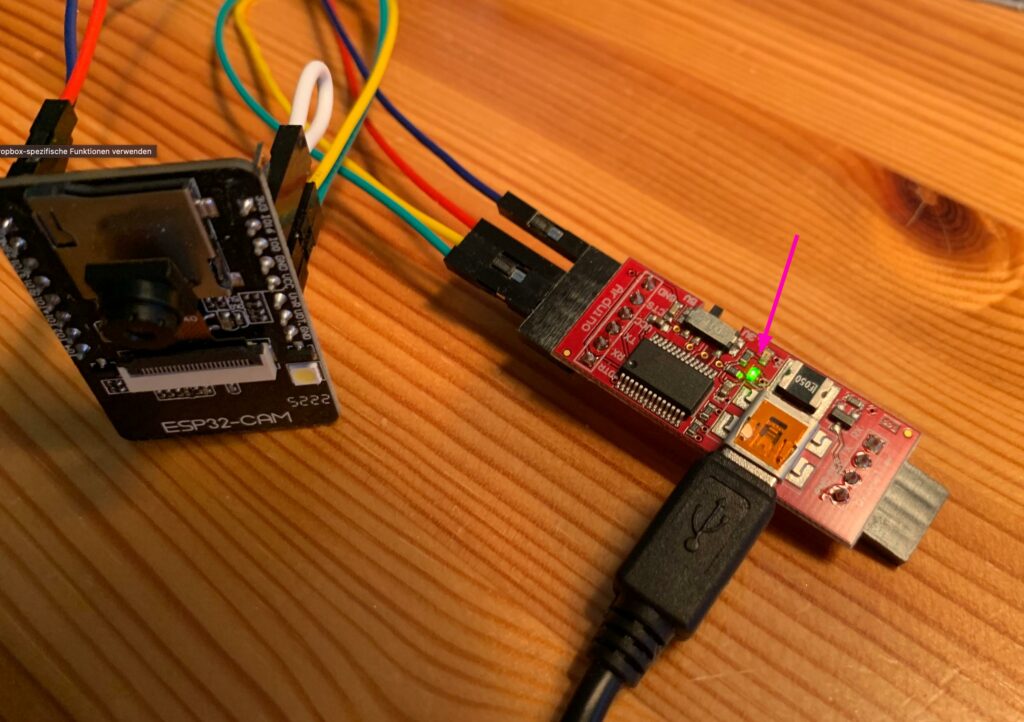
The ESP32 Cam model from AI Thinker is widely used, however, it does not have a USB port to connect it directly to a computer. Therefore, an additional FTDI is required. In my article about ESP32 Cam and FTDI, you can read everything about it and how to correctly wire the FTDI with the ESP32 Cam. I am assuming that you have wired the ESP32 Cam and the FTDI just as illustrated at the end of that article.
We can now connect the USB cable to the FTDI and thus connect it to the computer.
Create a new project in VS Code and PlatformIO
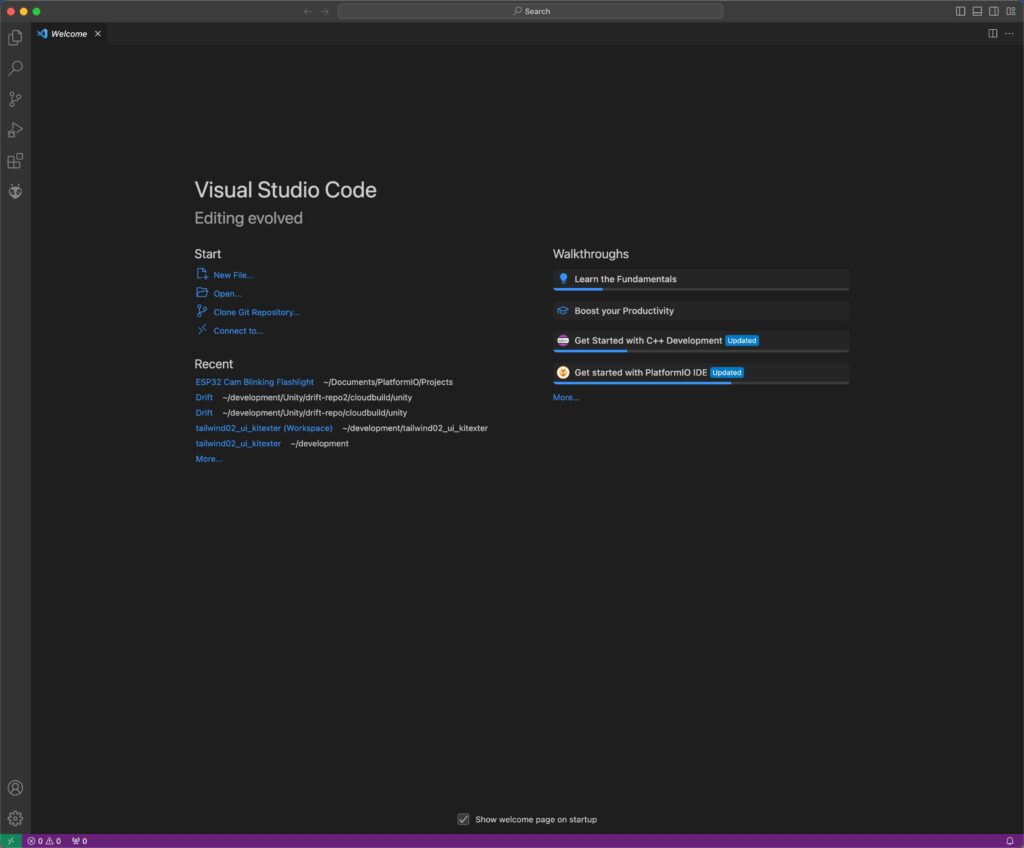
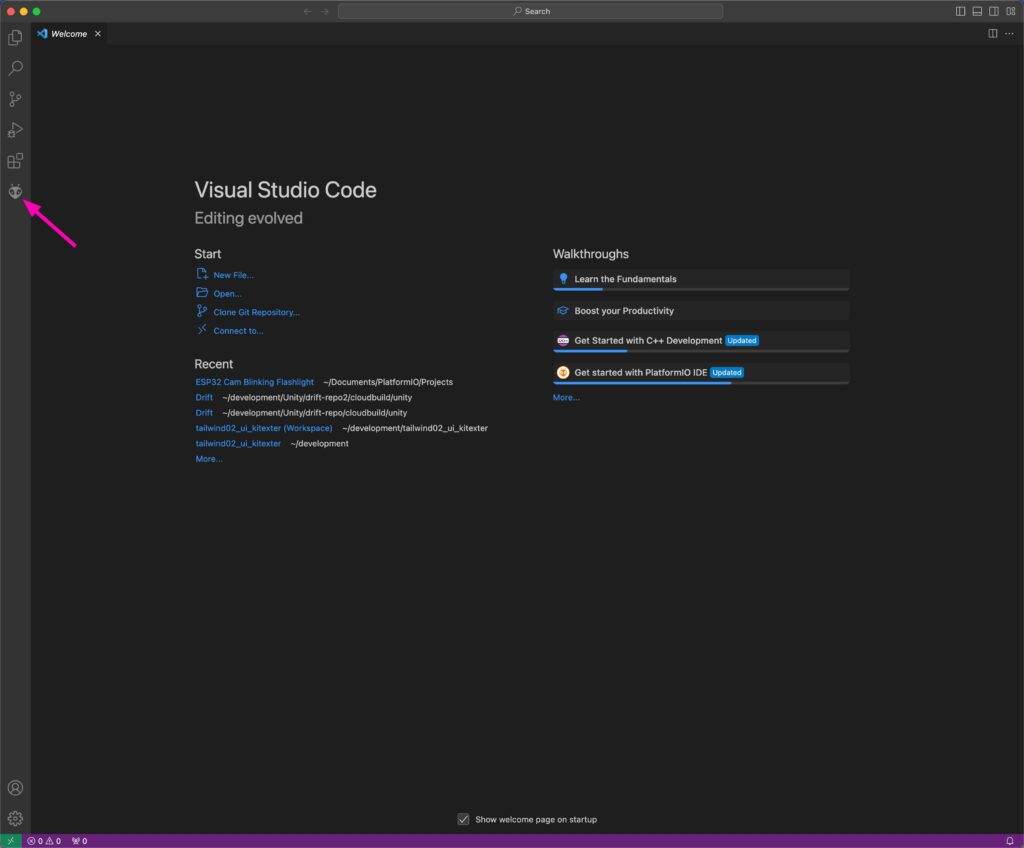
Now start PlatformIO by first opening VS Code. If the last project does not automatically open, the screen should look something like this:
If your last project opens, you can create a new fresh VS Code window by going to the menu bar and selecting Files > New Window. You can then close the other window.
Generally, there are always multiple ways to access the desired area in PlatformIO. Therefore, if you use different methods to navigate, that is perfectly fine.
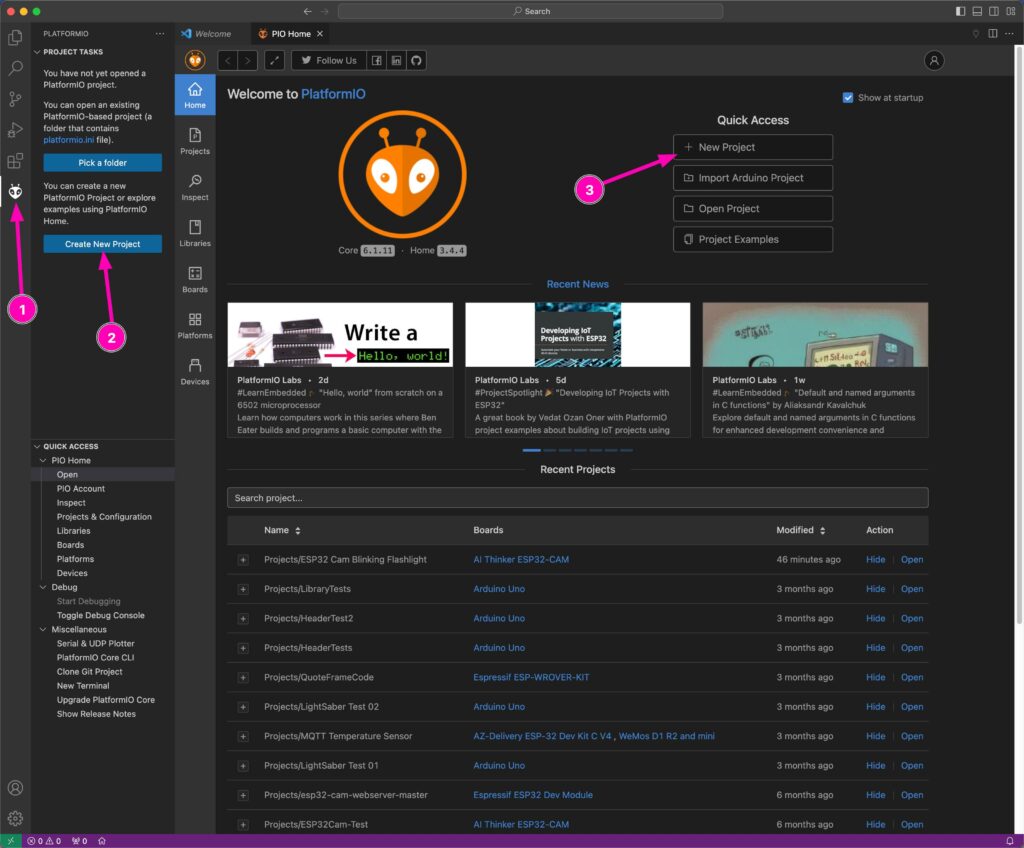
To create a new project in PlatformIO, click on the numbered items one after the other.
For a new project, PlatformIO requires some information. Refer to the following screenshot.
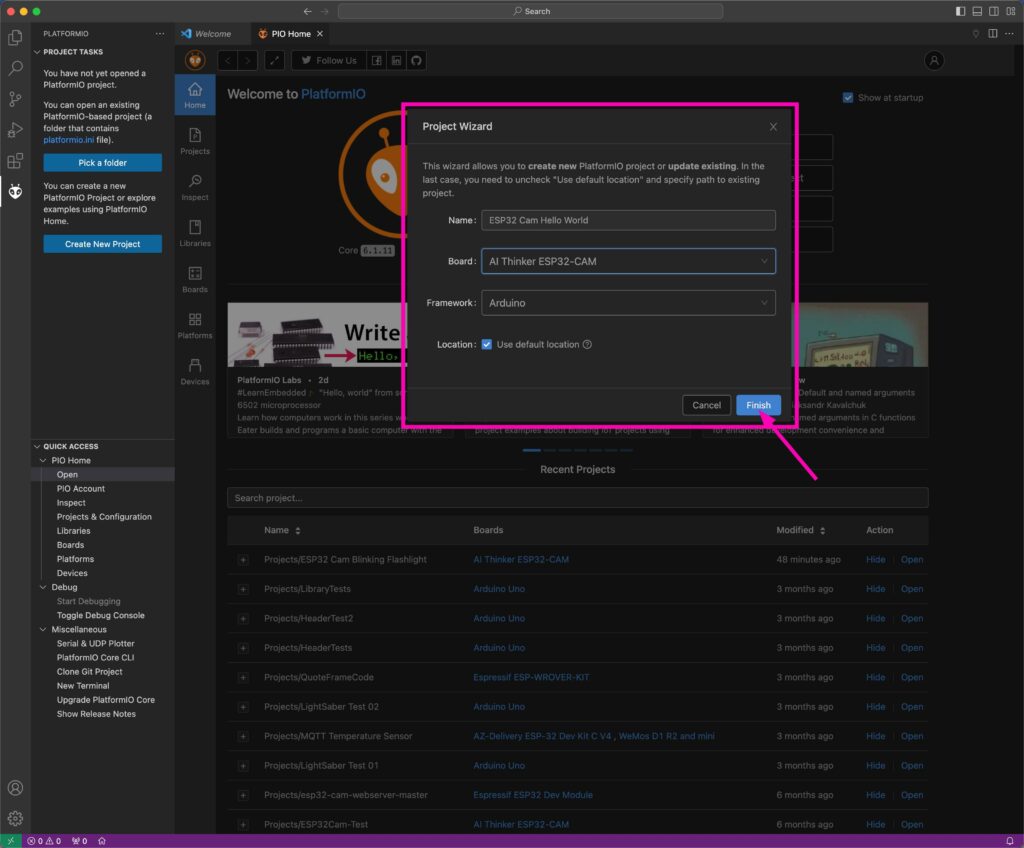
The name can be chosen freely, but you should adopt the settings for the board and framework. I would also leave the location at the standard settings, so leave the box checked. Unless you already know what you are doing here.
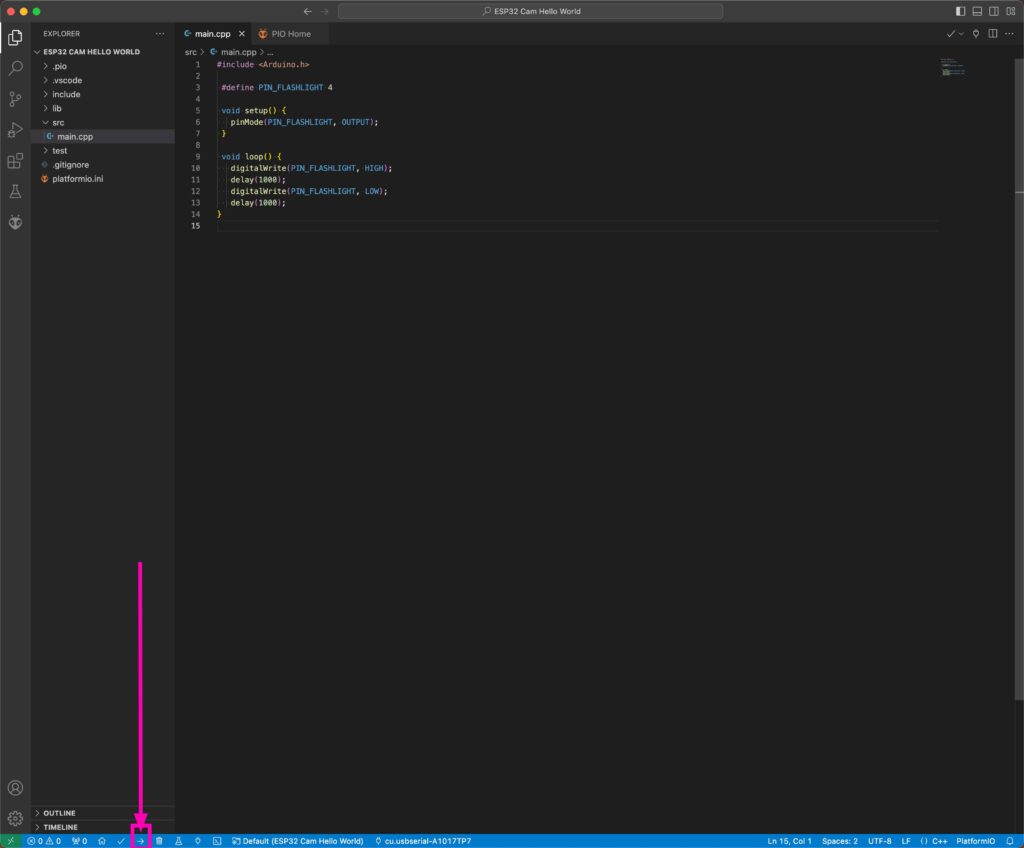
In the file selection, you will find the current code in the file src/main.cpp. Click on this file to open it in the editor. Initially, you will see the standard code that PlatformIO generates for every new project.

We must now replace this standard code with the following code:
#include <Arduino.h>

 #define PIN_FLASHLIGHT 4

 void setup() {
   pinMode(PIN_FLASHLIGHT, OUTPUT);
 }

 void loop() {
   digitalWrite(PIN_FLASHLIGHT, HIGH);
   delay(1000);
   digitalWrite(PIN_FLASHLIGHT, LOW);
   delay(1000);
}
Copy the code and insert it into the main.cpp file.
A placeholder named PIN_FLASHLIGHT is created at the top of the code. This placeholder is replaced with the value 4 during the compilation of the code.
In this case, the number 4 is the pin number of the flash LED of the ESP32 Cam.
In the main() loop, the flash light is now turned on and off for one second each.
WARNING: The flash LED is very bright!
Check code for errors
To verify whether the code can be compiled without errors, you can use this checkmark icon in the lower blue footer (see the marking in the image on the lower left).
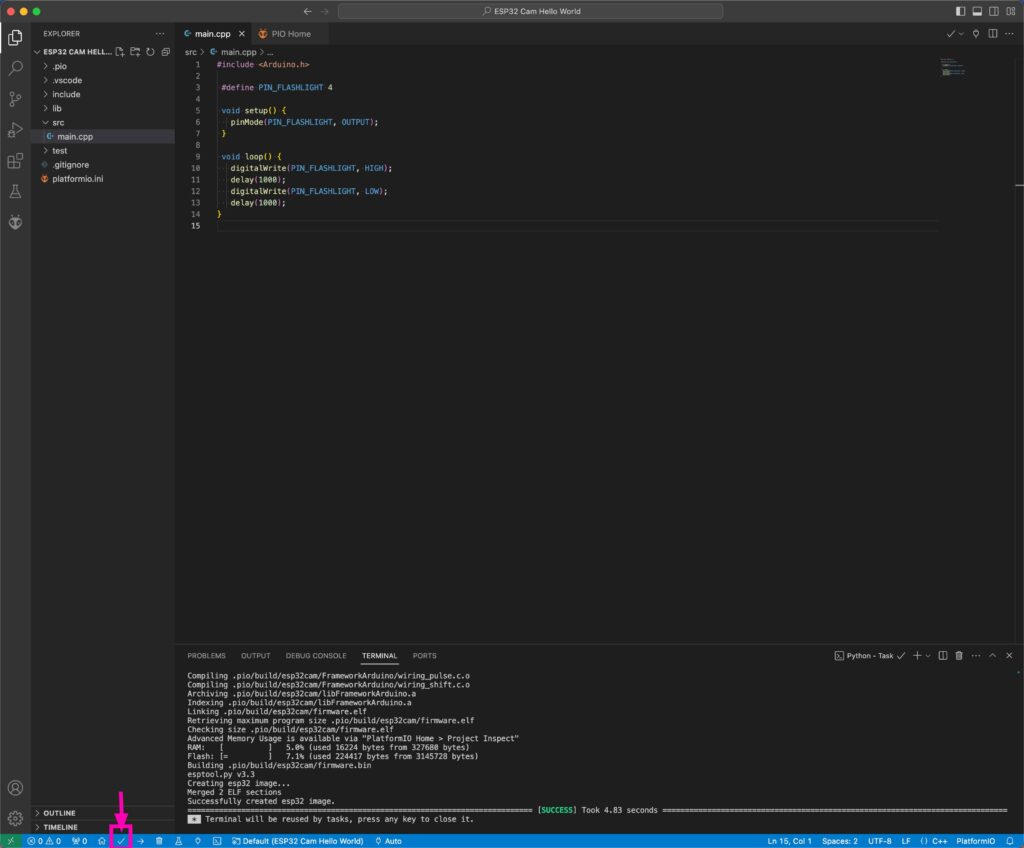
During the initial run, required libraries are downloaded and compiled; therefore, it will take a short while longer.
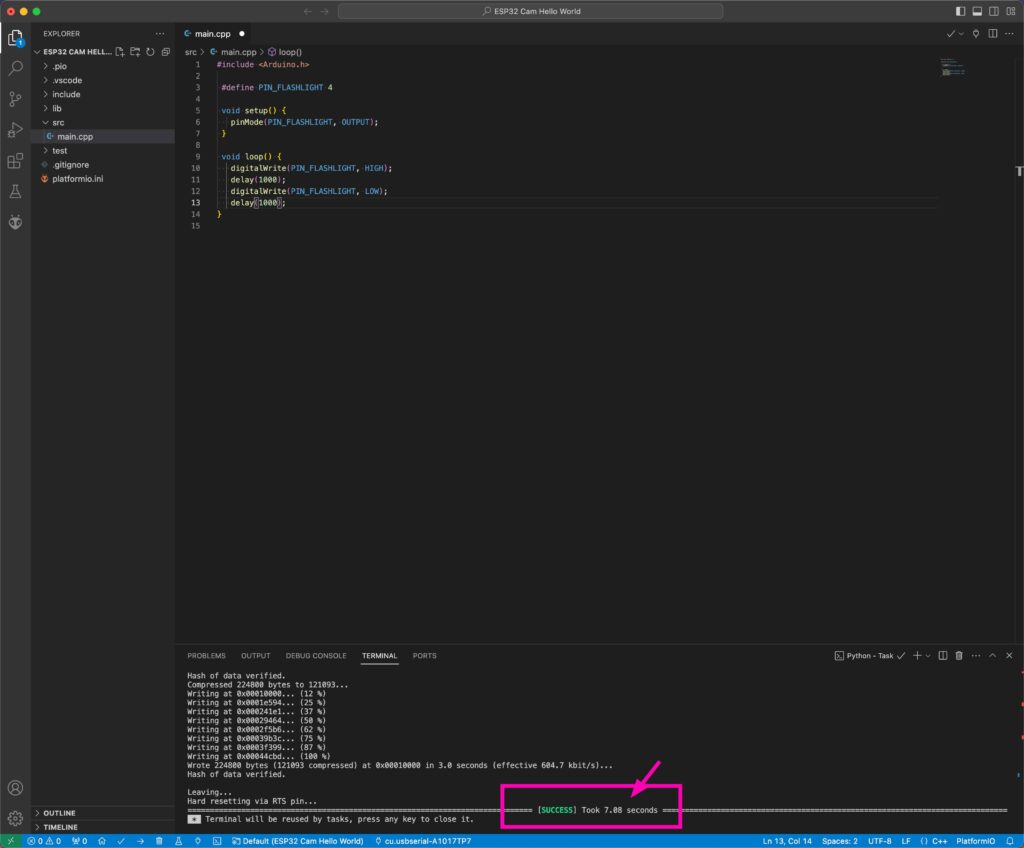
If a success message appears in the console (as in the image above), the code is compilable.
To now upload the code to the board, we first check whether the FTDI has been recognized by PlatformIO.
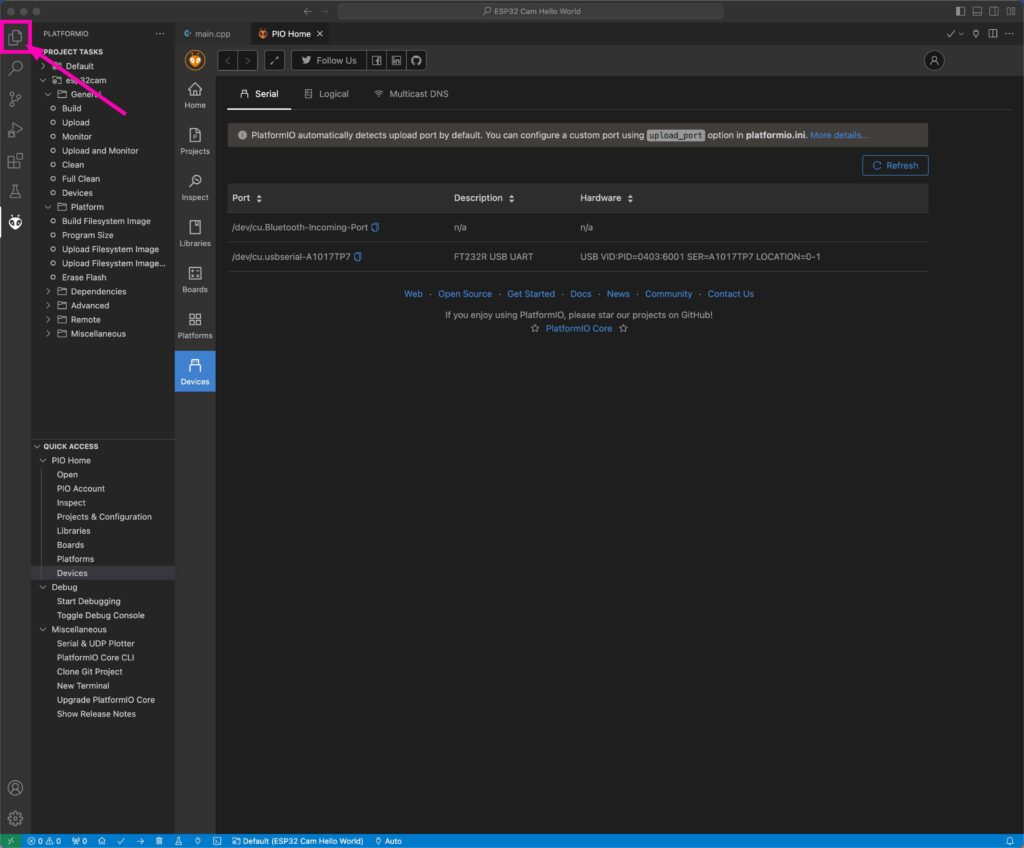
Check FTDI and ESP32 Cam in the device list
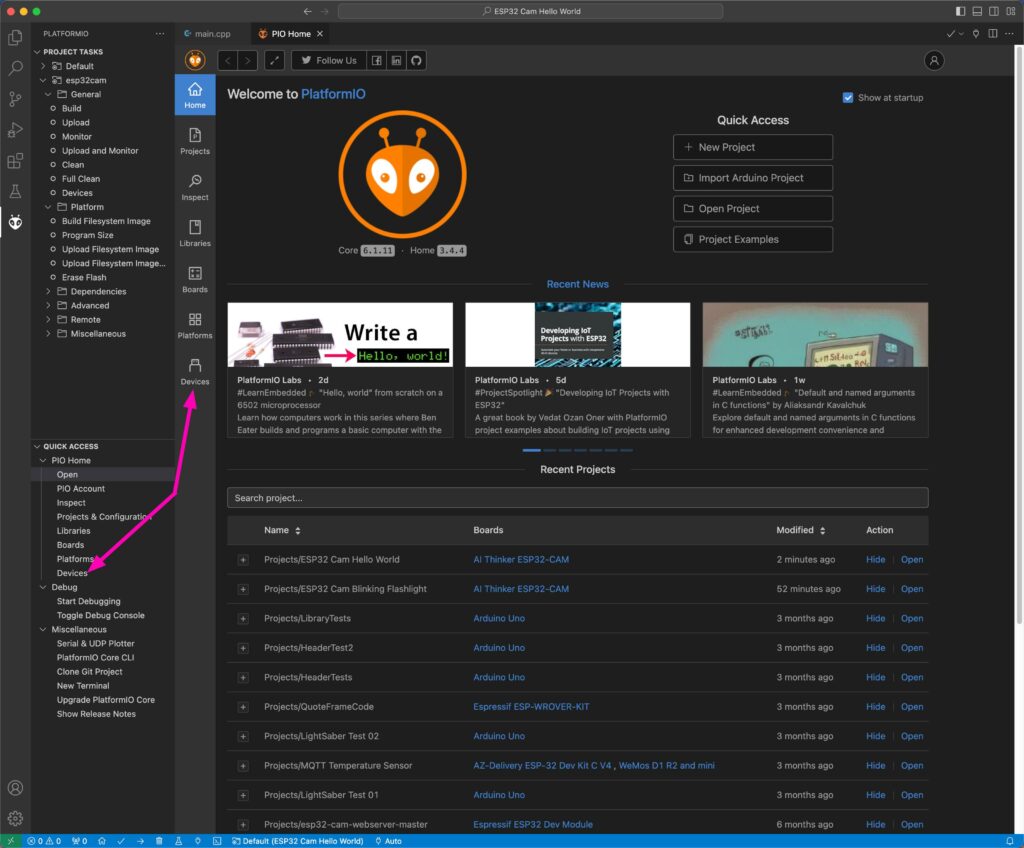
To do so, click on the PlatformIO logo (the alien head) in the left icon bar. Then open the list of recognized devices via the Devices section, either through the icon or from the Quick Access Menu.
On a Mac, my FTDI appears in the overview as follows:
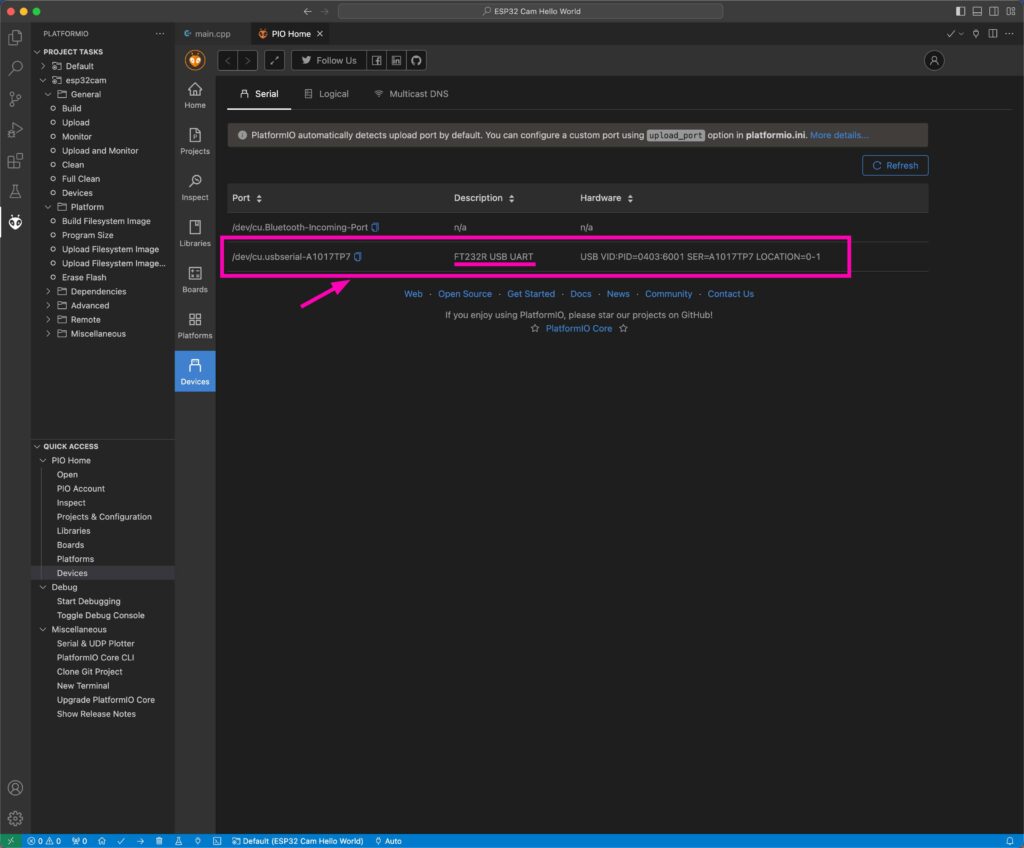
On a Windows computer, a COM port will be displayed in the Port column.
If your FTDI does not appear, click the Refresh button at the top right to reload the list of connected microcontrollers. If it still does not appear, refer to the notes on possible errors at the end of the article.
If your FTDI appears in the device list, as seen in the image above, we can now upload the code.
Upload program code to ESP32 Cam
You can switch back to the main.cpp, but it is not really necessary. The code does not need to be visible to upload it.
At the bottom in the footer, next to the icons, you can see which device is selected to upload the code. If you should have multiple microcontrollers connected, you can select the correct one here.
Now use the arrow icon at the bottom of the blue footer to start the upload.
LEDs should now be blinking on the FTDI, signaling the transmission of code to the ESP32 Cam.
If a success message is displayed in the console in VS Code, the process is complete.
Execute program on ESP32 Cam
Since the ESP32-Cam is in boot mode, the ESP32 Cam cannot automatically restart.
Therefore, you must now remove the jumper for boot mode and press the reset button on the ESP32 Cam. After that, the new program should start immediately, and the flash should begin to blink.
If you don’t know what this jumper thing is about and why the boot mode has to be set manually, refer to my ESP32 Cam and FTDI article.
Outro
You have now learned how to upload code to the ESP32 Cam without a USB port using PlatformIO, VSCode, and an FTDI. This principle can be applied to all microcontroller development boards that are without a USB port, such as the Arduino Mini Pro.
So far, we have only managed to make the flash LED blink. This means that you were able to establish a connection to the board and upload code to the ESP32 Cam.
In upcoming articles, we will look into how to take photos and videos with the ESP32 Cam, save them on an SD card, and how to create a live video stream.
Possible Errors
If you encounter error messages during this tutorial, here are a few tips that might help.
The FTDI or the FT232 chip does not appear in the device list
Possible Solutions:
- Try connecting the FTDI before starting PlatformIO and VS Code
- Check whether drivers for the FTDI are needed, also refer to these FTDI documentation for your operating system: https://ftdichip.com/document/installation-guides/
- Restart the computer
In the console of VS Code, an Upload Failed Error appears instead of Upload Success.
Possible solutions:
- Check if your FTDI is really appearing in the device list.
- Check the wiring between the FTDI and the ESP32 Cam.
- Make sure that the FTDI is set to 5V.
- Verify if the ESP32 Cam is in boot mode (jumper cable).
- After you have connected the jumper cable for the boot mode, press the reset button on the ESP32 Cam board once more before starting the upload.