
Screws are sometimes annoying. Because the right screw is often no longer available in sufficient quantity. Besides, you have to turn them forever. And especially in the prototype phase you have to remove your board with the microcontroller more often. I have a great thing for you, I call the whole thing: PCB Clips.
PCB stands for Printed Circuit Board. I use this term as a generic term for all PCBs that can be used in your project. Be it etched boards, breadboards or boards from the 3D printer. PCBs from the 3D printer? Yes, this is also possible – by the way, I made a video about it.
Ok, then I’ll show you how to bring the clips in the desired size to fit your board and how to use them.
Affiliate Links Notice
In this article I use so-called affiliate links. If you use these links, I get a small commission from the linked merchant.
This has no influence on your purchase price - the price stays the same for you!

Customize clips in FreeCAD
The fitting is done really fast, I built the CAD model parametrically. So you only need to adjust three numbers in a spreadsheet, done.
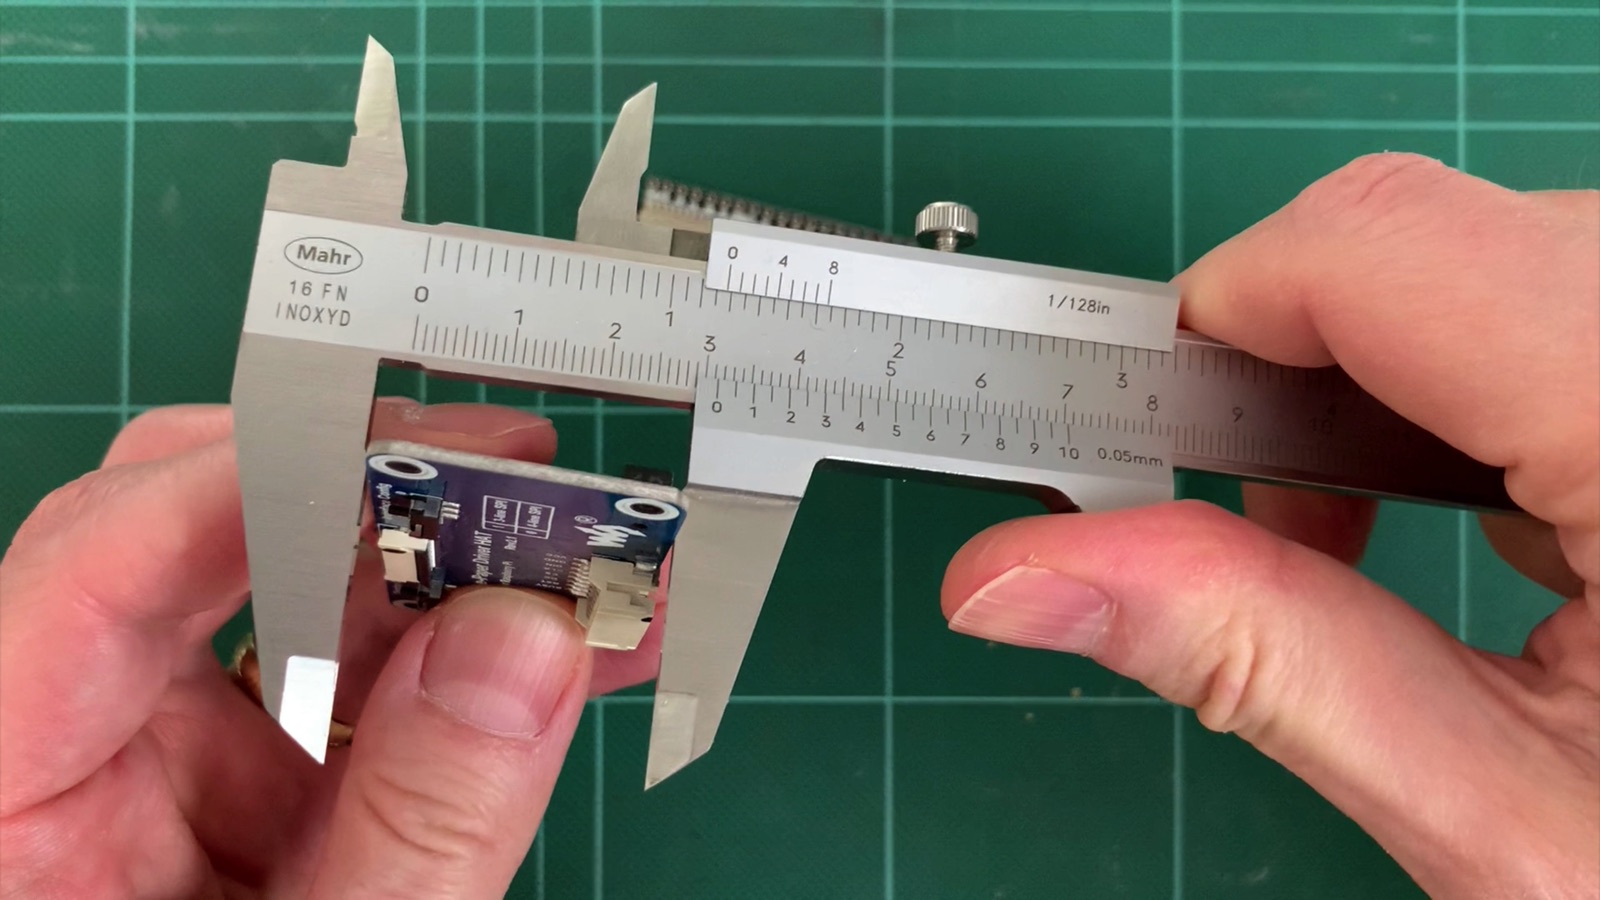
So you first need the length of one of the sides of the board. Usually this will be the narrower side.
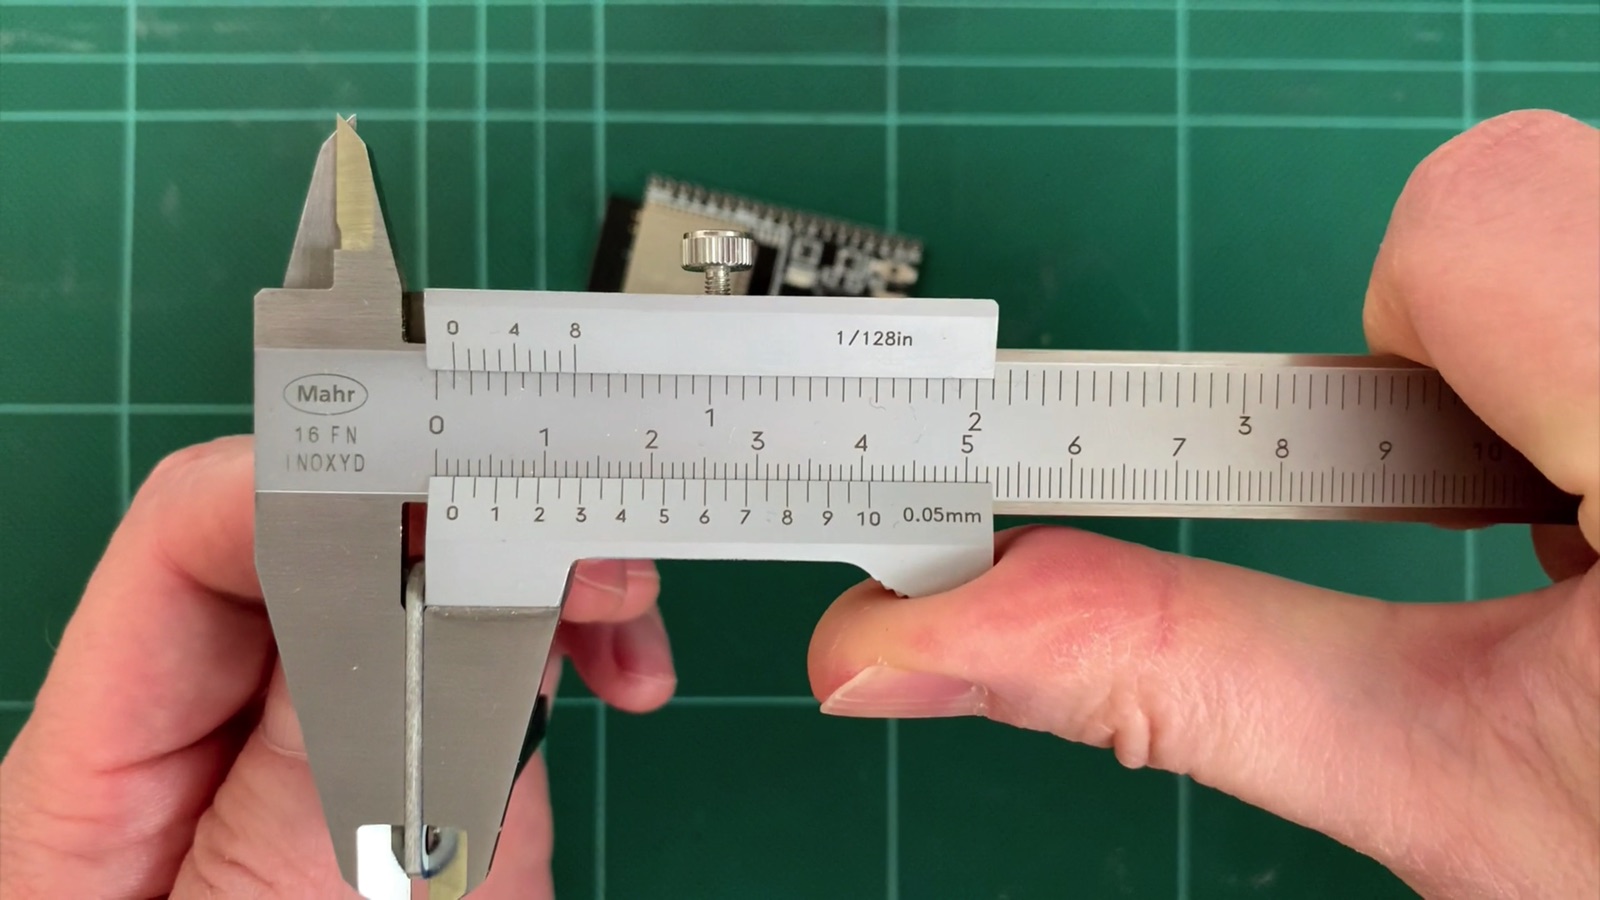
Then you need the thickness of the board. For my boards I always measured 1,6 mm, this seems to be a standard.
If you use for example one of my 3D printed boards – they are of course much thicker.
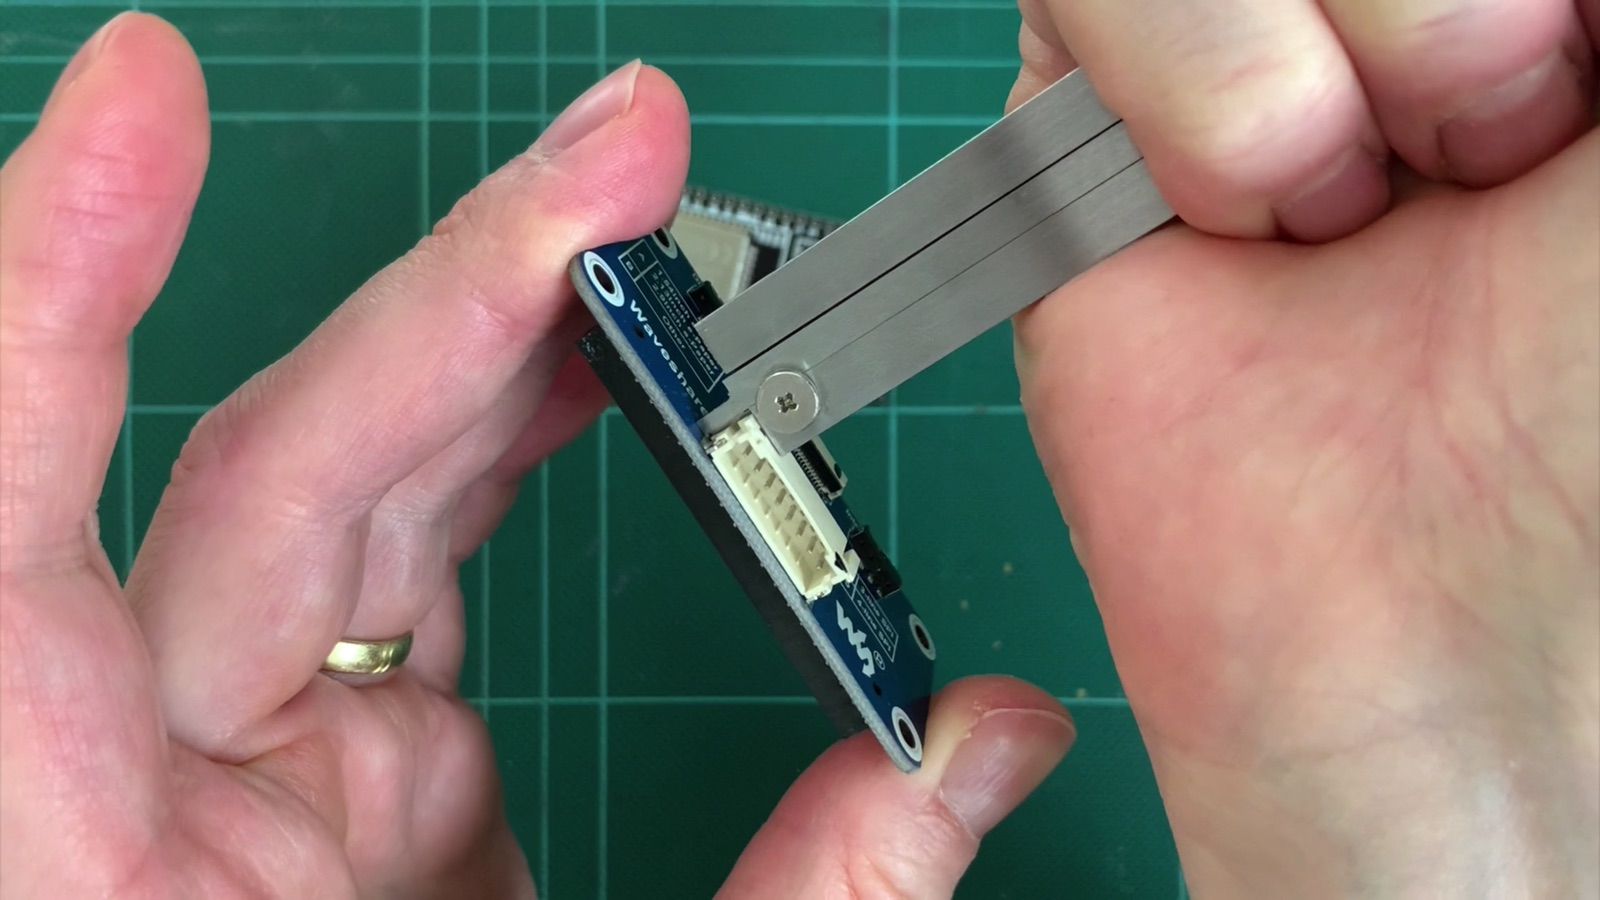
The last thing you have to check is if there are any components on the bottom side of the board that are very high. So we still need the minimum distance between the board and the bottom side of the clip.
Download the project file from GitHub and open it in FreeCAD.
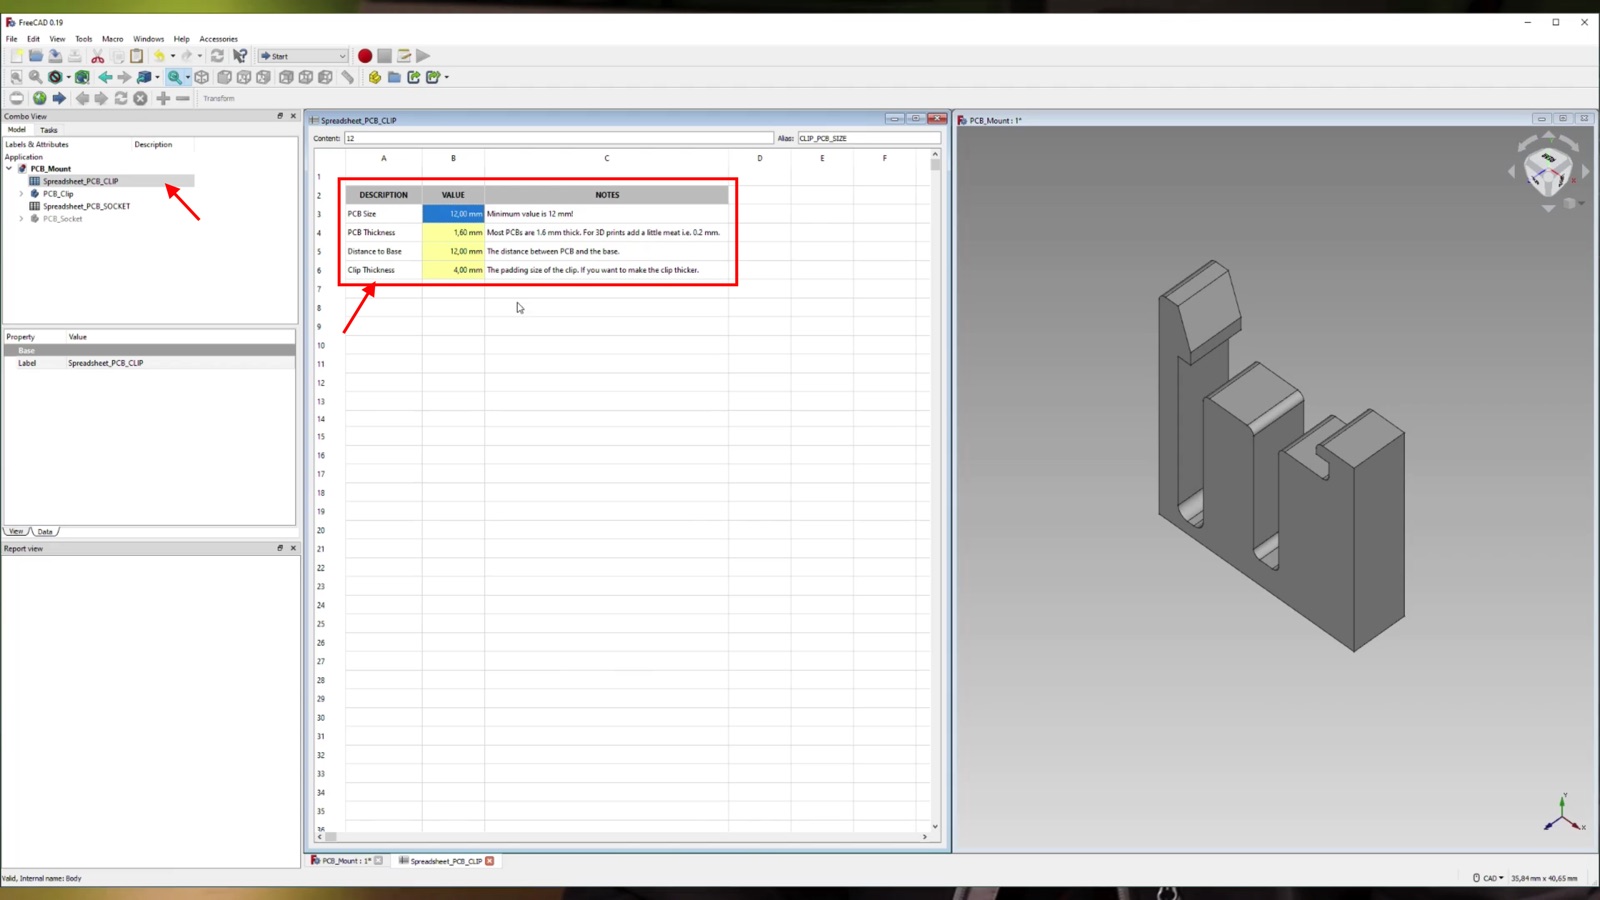
On the left side of the combo view there is a spreadsheet. Click on it once and the spreadsheet editor will open. It’s like an Excel file.
In the column Value you enter your values. PCB_SIZE is the value for the PCB length, PCB_THICKNESS is the value for the thickness of the PCB. And BASE_DISTANCE is the distance to the bottom of the clip.
From experience no 3D printer prints absolutely precise, besides there are expansions and it also depends on the used slicer print profile, how precise the printout will be.
For me, I always add 0.4 mm to the PCB_SIZE and PCB_THICKNESS. That clamps then still quite well and is not too crumpled. You may have to try out what works well for you. Fortunately, the clips are printed quickly.
If you want you can also adjust the thickness of the clip with the value CLIP_PAD. I have had good experience with 4 mm for PETG. The clip is still flexible enough but does not break away.
Export Model in FreeCAD
Ok then click once on the PCB_Clip Body in the Combo View. Then you should see the clip with the new dimensions. For exporting the body must be really selected (blue highlighting), so that FreeCAD knows what should be exported.
Now go to File > Export and save an STL file. You can then load this into your slicer and send it to the 3D printer.
Customize clips in Fusion360
If you are working with Fusion360, you can of course also adjust the dimensions.
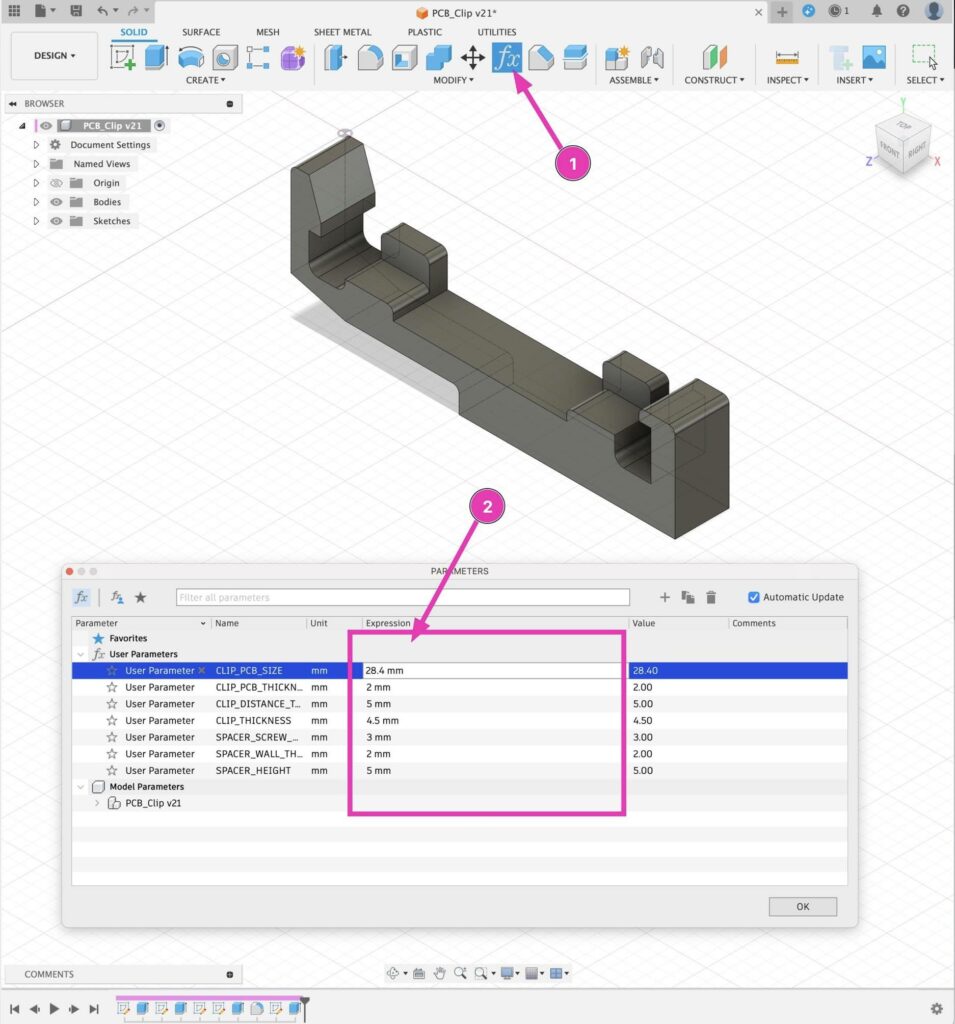
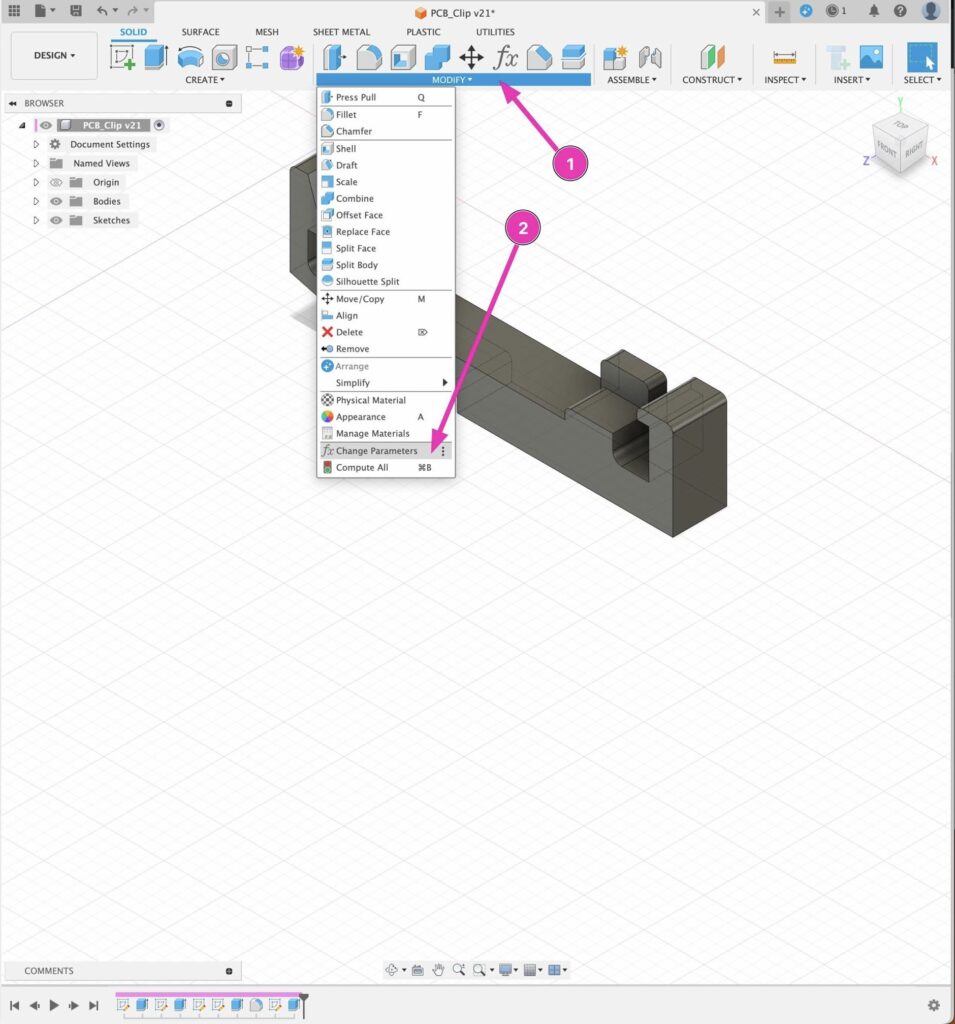
First open the table with the parameters. To do this, click on the fx symbol in the Modify menu area. The table with the parameters will then open. If the fx symbol is not visible, take a look at the second screenshot below. There you can see how to open the table anyway.
You can adjust the following values in the table:
| CLIP_PCB_SIZE | Narrow side of the PCB |
| CLIP_PCB_THICKNESS | Thickness of the PCB |
| CLIP_DISTANCE_TO_BASE | The distance between the PCB and the underside where the clip is glued on. Increase if, for example, there are large, high components on the PCB. |
| CLIP_THICKNESS | The strength of the clip – increase for more stability, but then also becomes stiffer |
Gluing
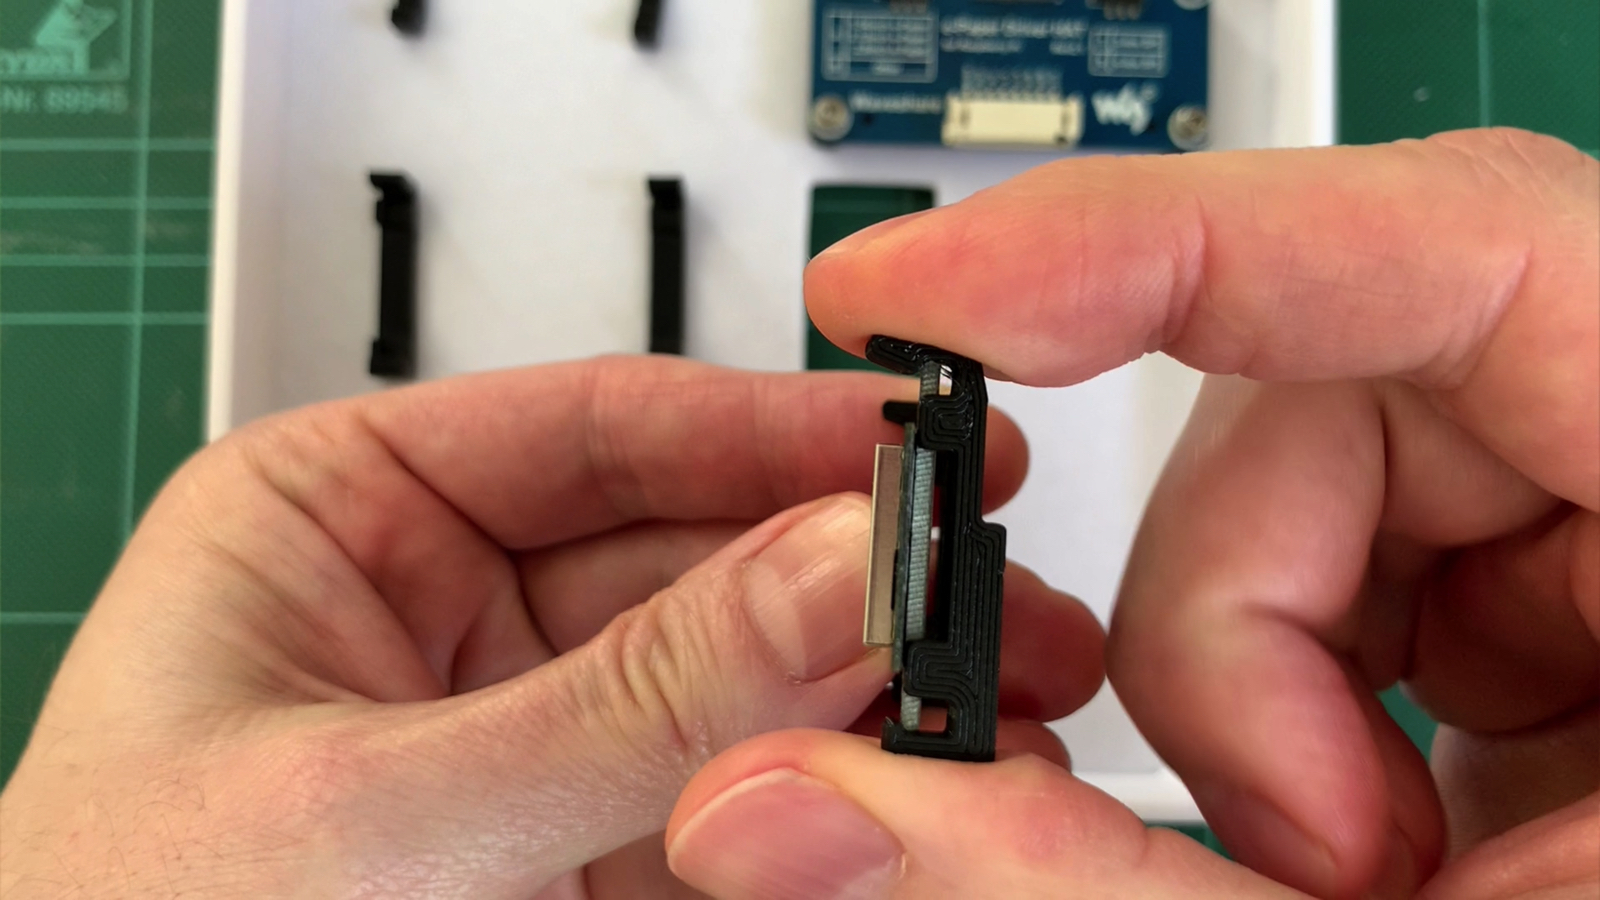
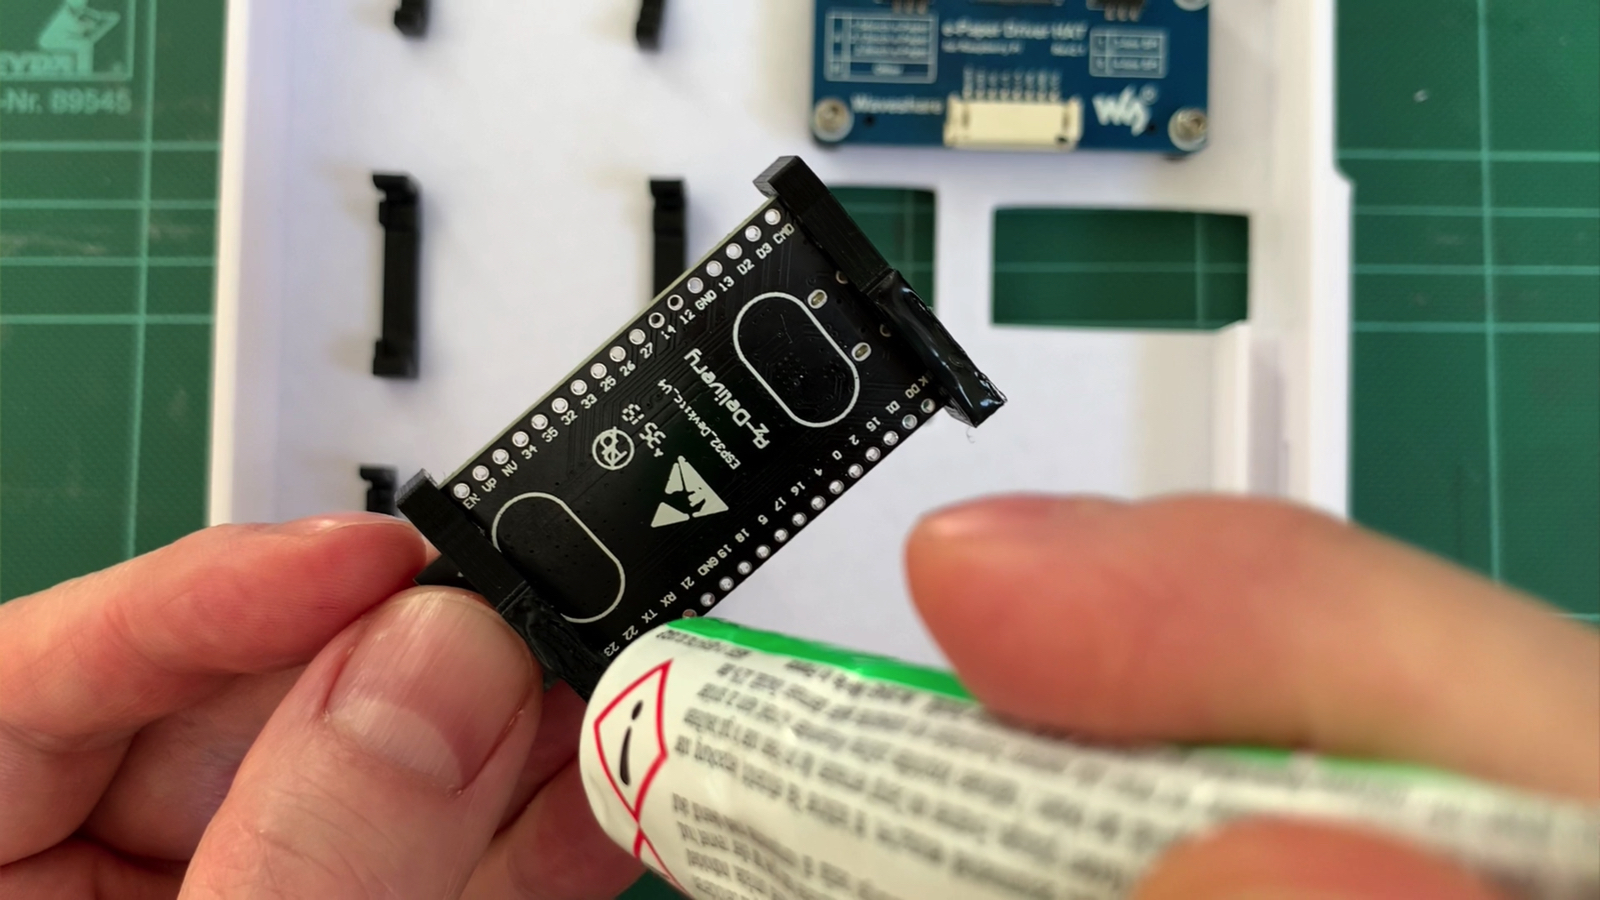
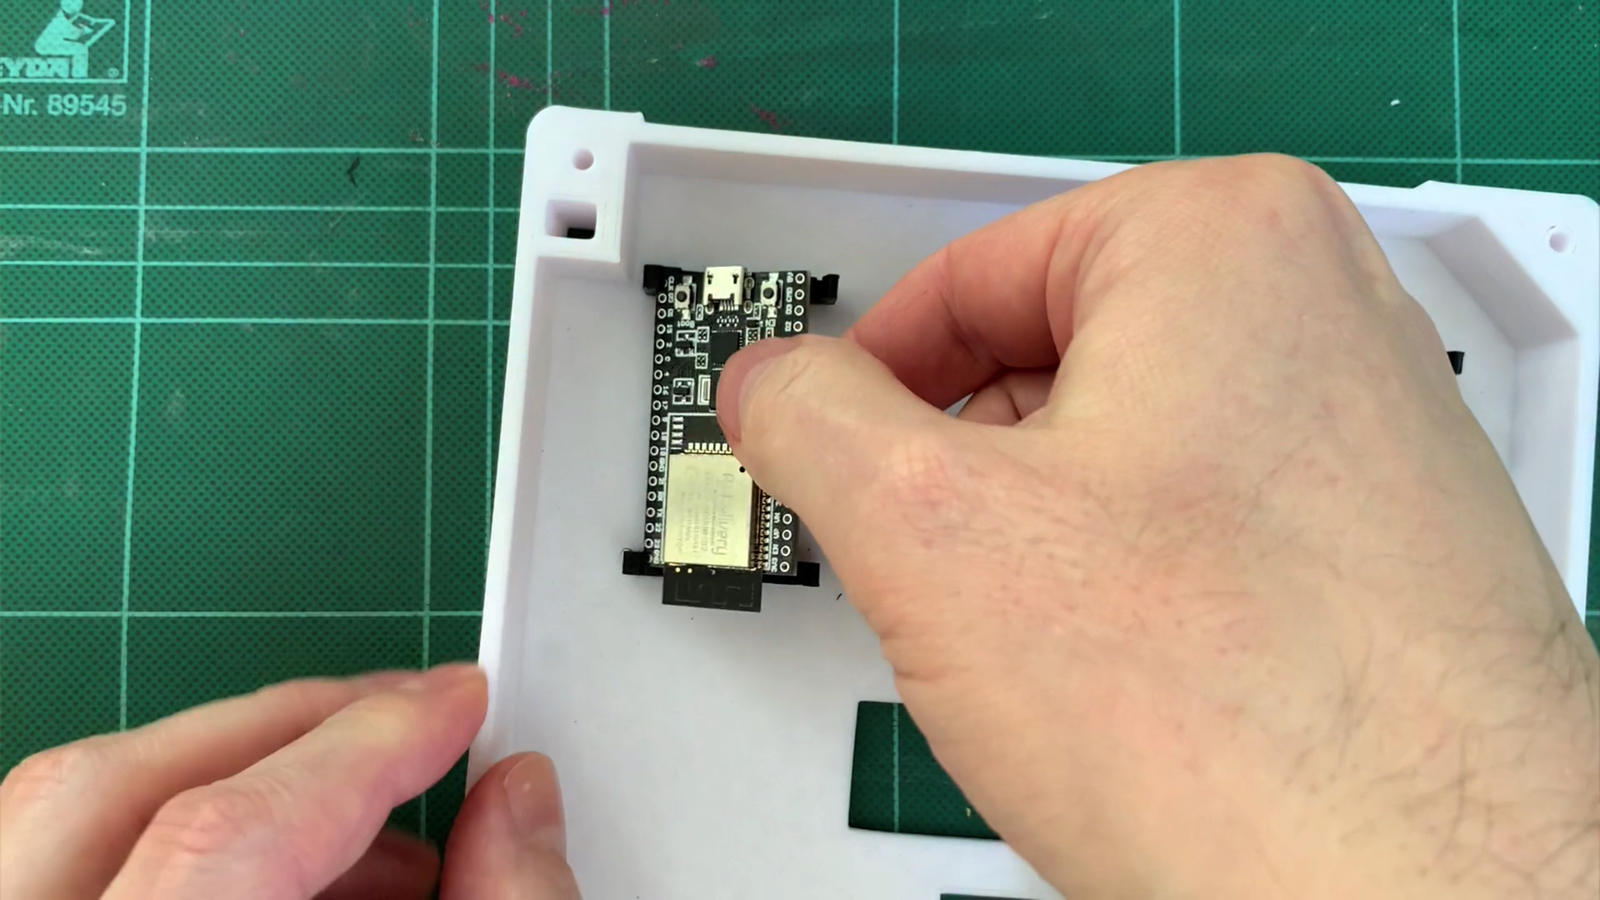
After printing, check if everything fits. If everything looks good, leave the clips on the board and glue the clips now as you need it. I like to use this superglue from Langlauf Schuhbedarf, I had good experiences with it. Of course, you can also use epoxy or whatever. The main thing is that it holds well … somehow clear when gluing …
When the glue is dry, simply clip in or out as needed.

Filament
A word about the filament. Of course, you need a filament that does not break quickly. PLA is therefore out of the question. I recommend PETG or Nylon. They are quite flexible, do not break so fast and are not so demanding when printing.
ABS would probably also work, but it is rather the diva among the filaments: it must not get too cold, so it is best to print only in a closed housing, otherwise it warps. In addition, it stinks quite unhealthy when heated.
Outro
So, and that brings us to the end of this article. I hope one or the other will try the clips. Write in the comments if it works or if it causes problems. If you like the idea of the clips, click the thumbs up on YouTube. If you like the video, please subscribe to my YouTube channel and activate the alarm. I would be happy.
Keep tinkering, stay healthy, I’m off to shovel snow.
Bye ?
Links
Software & 3D Modell
- FreeCAD
- FreeCAD Projekt auf GitHub
- FreeCAD Projekt (ZIP file)