The Art of Crimping!
Here I show you how to make your own jumper cables for Arduino, ESP32 and Co. – with a suitable crimping tool and some stranded wire you already have the most important materials. Step-by-step I show you the way to a ready crimped jumper cable. And I tell you when you should rather use JST connectors instead of Dupont connectors. JST and Dupont means nothing to you – then read on or watch the video.
Especially in the prototype phase it often makes no sense to solder the cables. After all, you often have to reconnect the connectors … arrange them differently again … then try something else … etc.

So we use cables with connectors that can be easily disconnected. Breadboard and jumper cables are the standard tools for the microcontroller hobbyist.
Surely you have a drawer full of jumper cables in different colors and configurations.
But somehow you are still missing this one cable. And now we just build it ourselves. It tastes best when you cook it yourself.
Which Connector Types to Use?
In my projects, three types of plugs have prevailed.
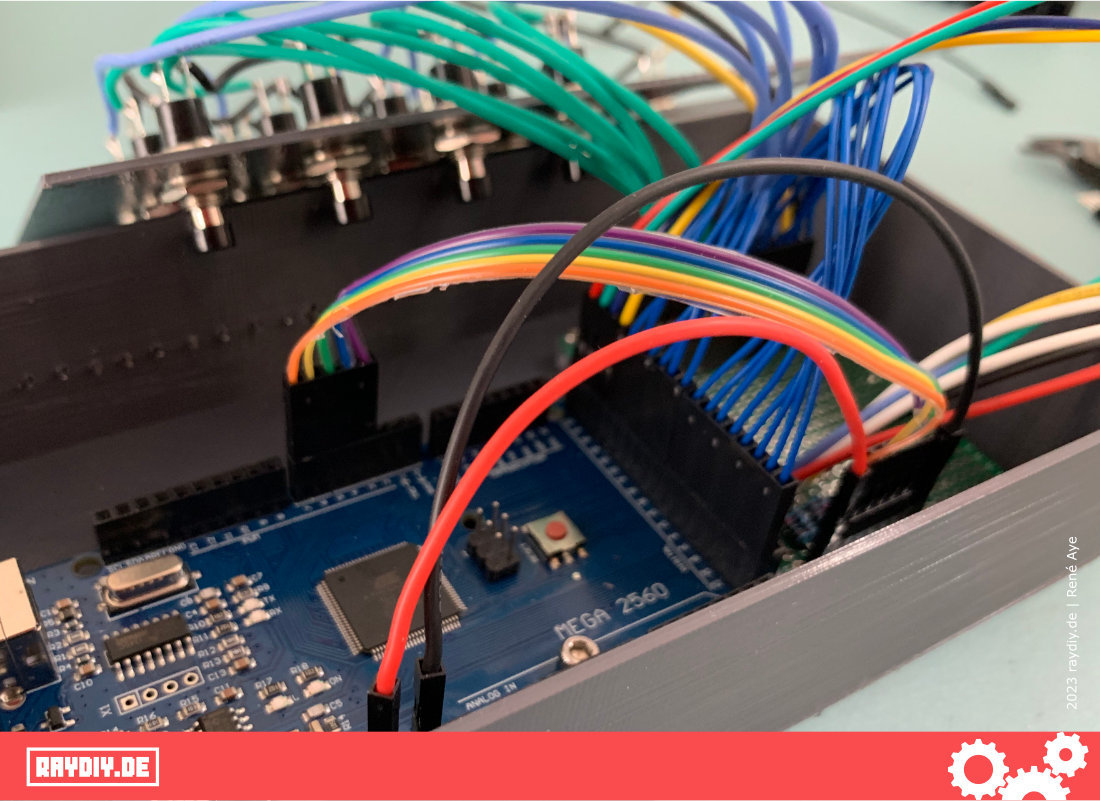
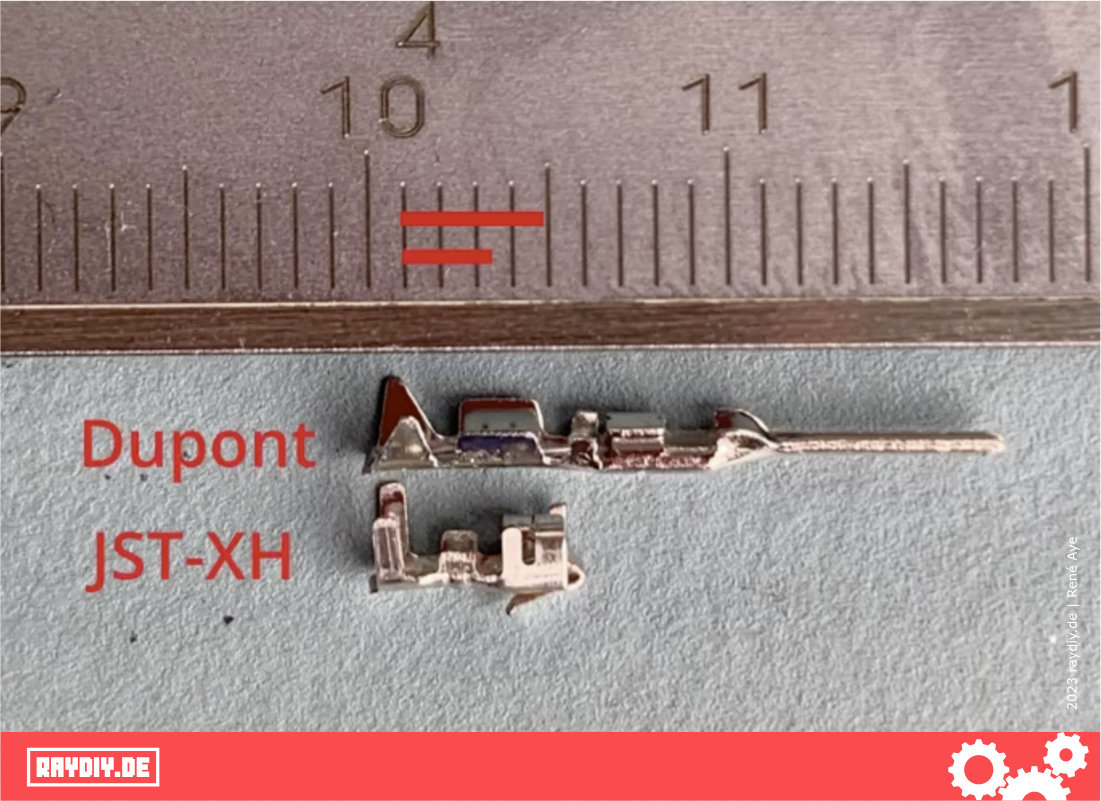
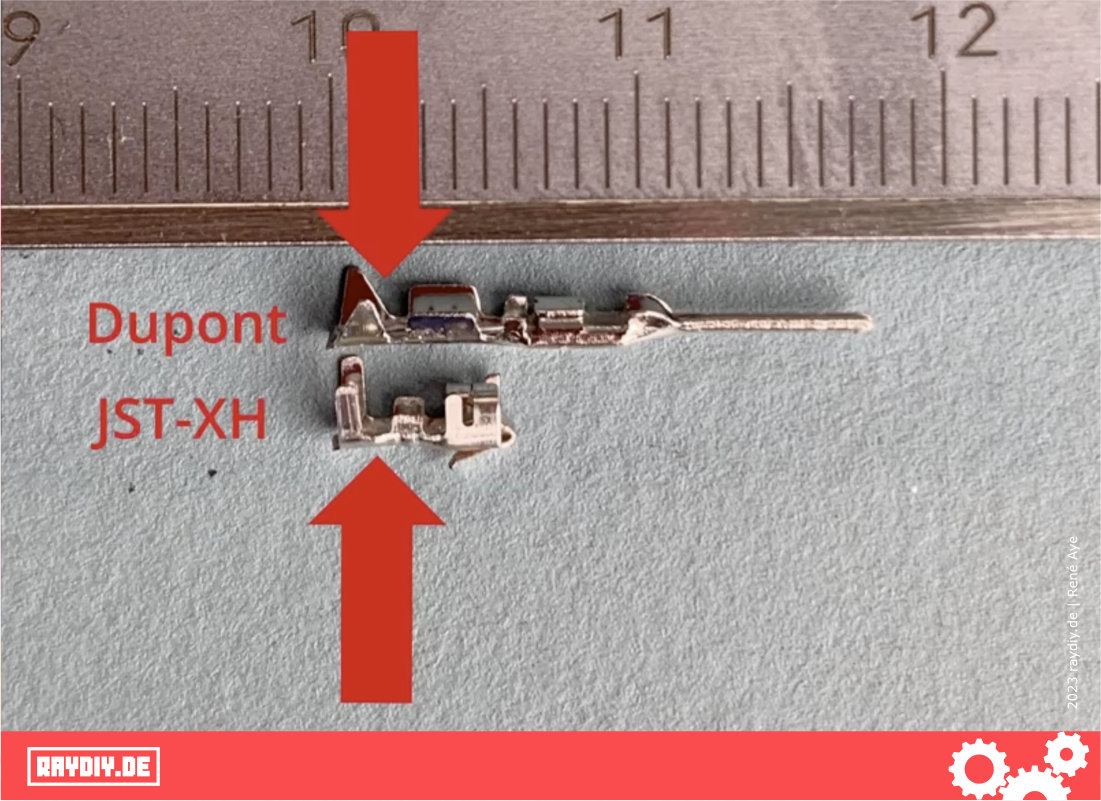
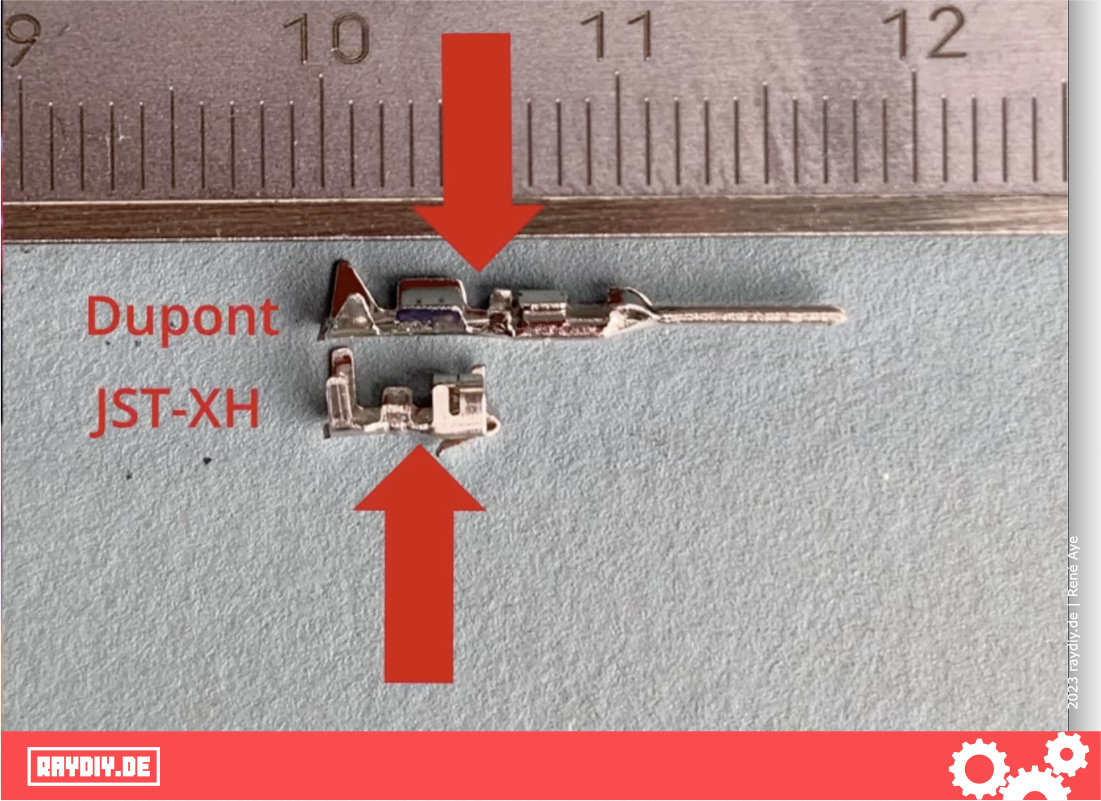
Firstly, the well-known Dupont plugs – these are the plugs we know from the jumper cables.
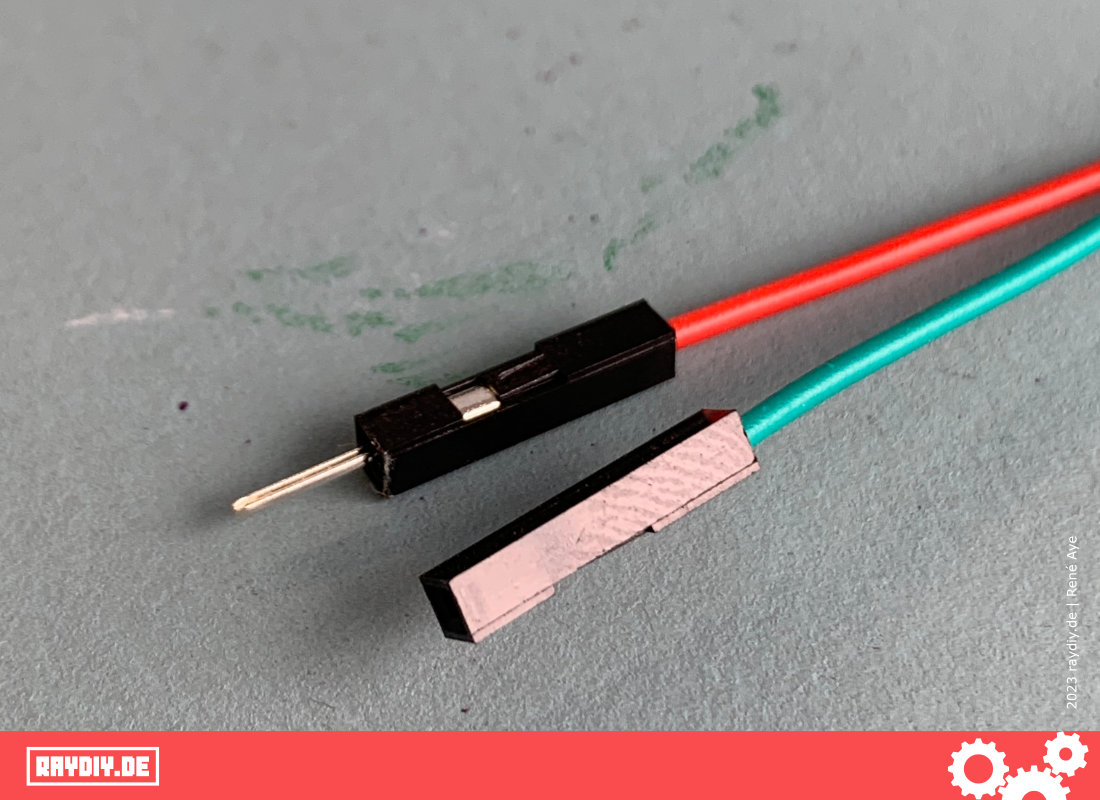
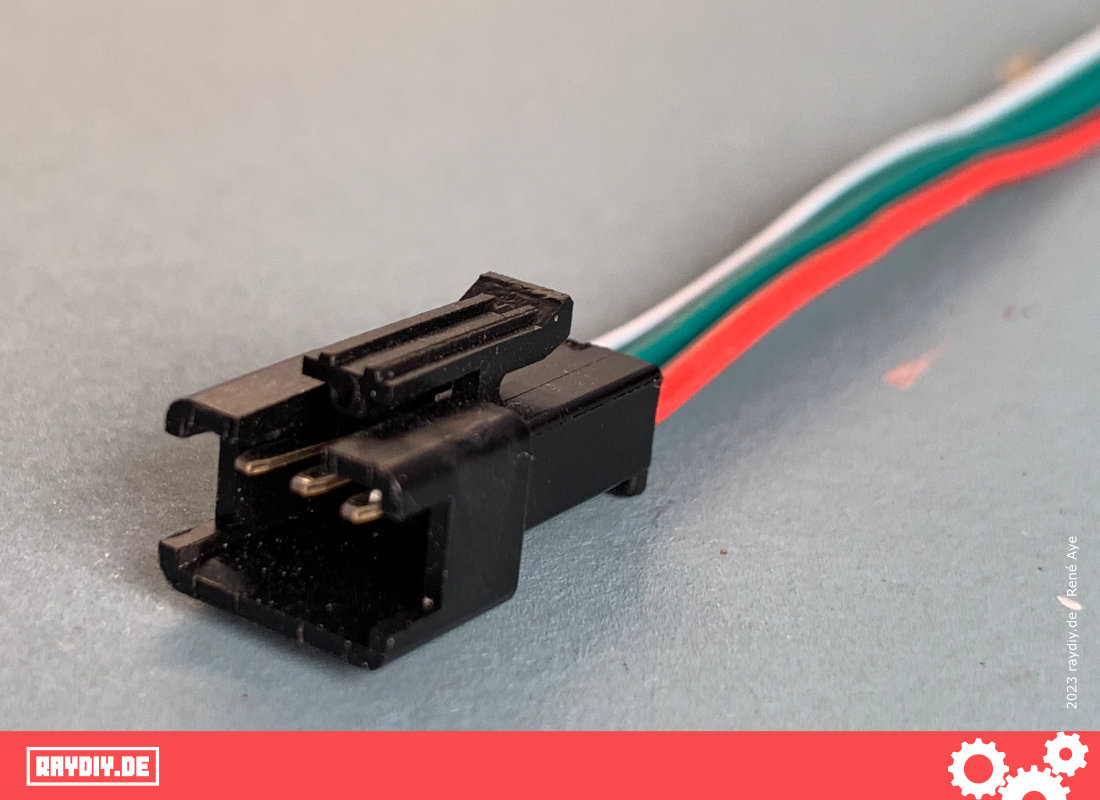
I also like to use so-called JST connectors – JST-XH to be more precise – and occasionally JST-SM connectors.

JST stands for Japan Solderless Terminals and is a company founded in Japan with a huge product range of electromechanical components – including connectors.
Each product type or connector type has its own letter identifier. One of the JST connectors, which is widely used in Arduino, ESP & Co (but also in general in electronics and PC technology), is the JST-XH connector.
When Should I Use JST-XH Connectors?
So when do I use a JST and when a Dupont connector? Good question!
In principle, you could do everything with Dupont connectors. The advantage of JST-XH connectors: they can only be plugged into the matching JST-XH socket in a certain direction. In addition, the plugs hold much better in the socket due to a clip system.
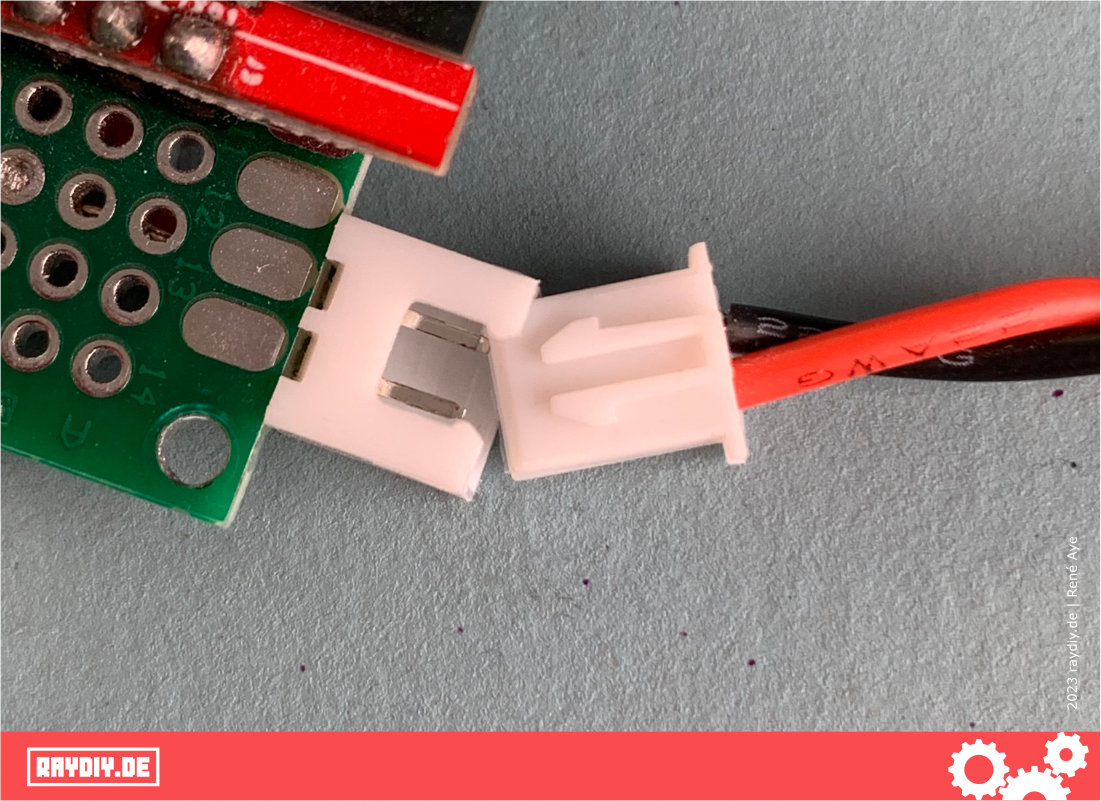
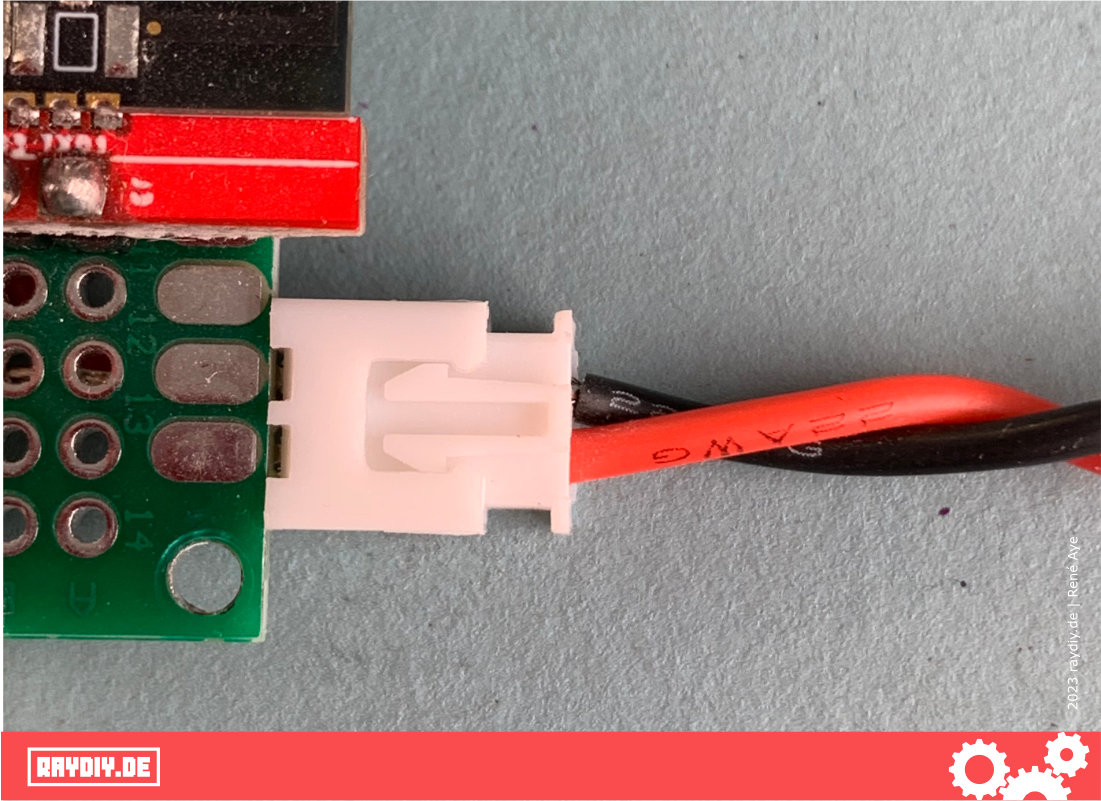
I.e. whenever it is particularly critical to connect the plug correctly and it should not come loose too easily, such a JST-XH plug is a good choice – e.g. for the power supply. Here you should avoid to interchange positive and negative pole, because otherwise … ?
In principle, the JST-XA connector type would also work. This has an additional clamp, i.e. the plug sits even tighter. But it is also more difficult to remove.
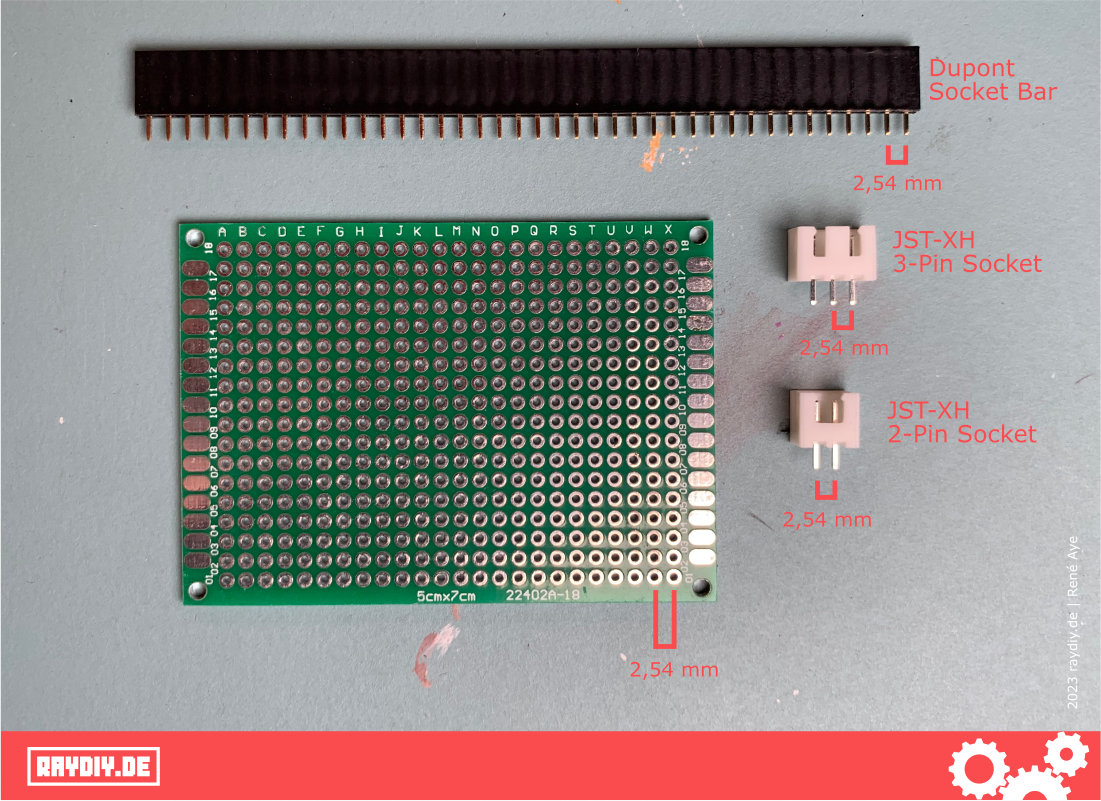
Also important: the sockets of these two connector types (and also the Dupont strips) have pins with a spacing of 2.54 mm. And this is the usual spacing of our beloved breadboards.
I.e. if you want to solder these sockets on a breadboard, this is possible without further ado, because the pins fit exactly into the breadboard.
But there are also JST types whose socket pins have a different distance.
What Are JST-SM Connectors?
By the way: I have made a very extensive article and video on the subject of Neopixel or WS2812 LED strips. These LED strips often come with a soldered connector. This is usually also a JST connector, namely the already mentioned JST-SM connector. And of course you can also crimp this yourself.
What Tools And Materials Do You Need For Crimping?
Now let’s look at how to make cables with such connectors yourself.
For this I recommend the following tools:
And depending on which connector types you want to crimp, you need a corresponding crimp assortment:
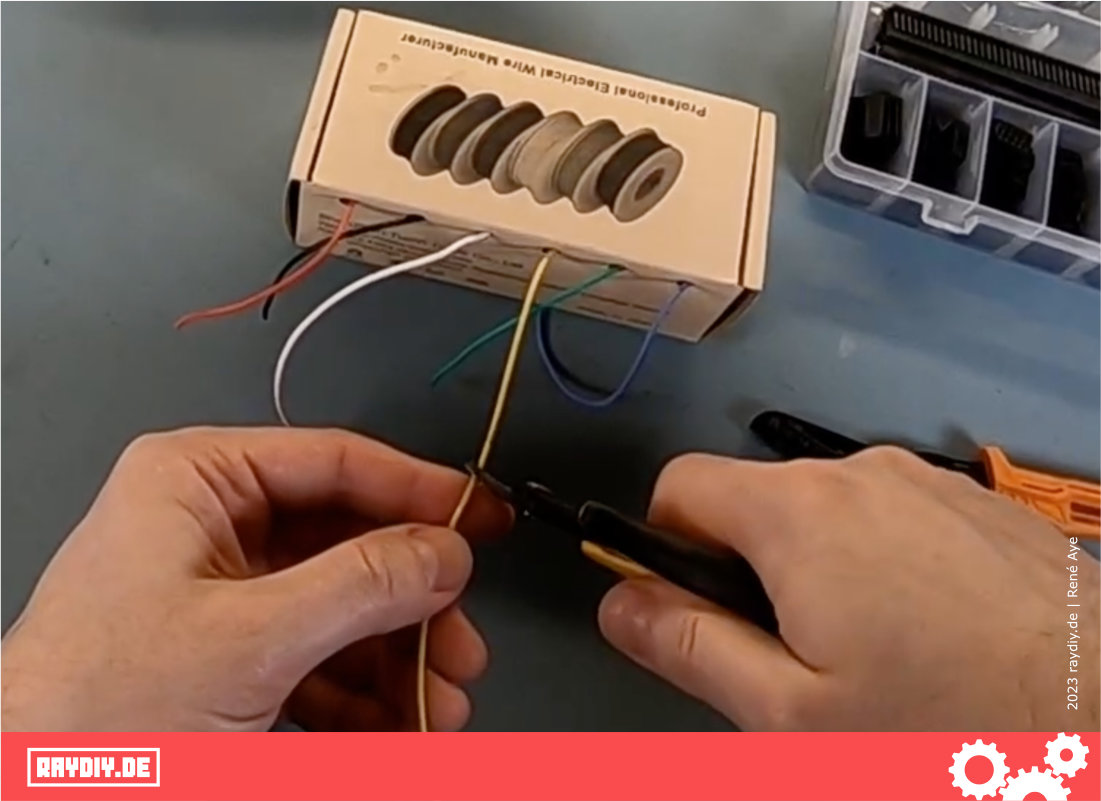
Which Stranded Wire Do I Use For My Arduino And ESP32 Projects?
A word about the stranded wire: it must not be too thick and in no case too thin. First: crimping will not work if the wire is too thin, and second: current flows through it – so thicker is always better.
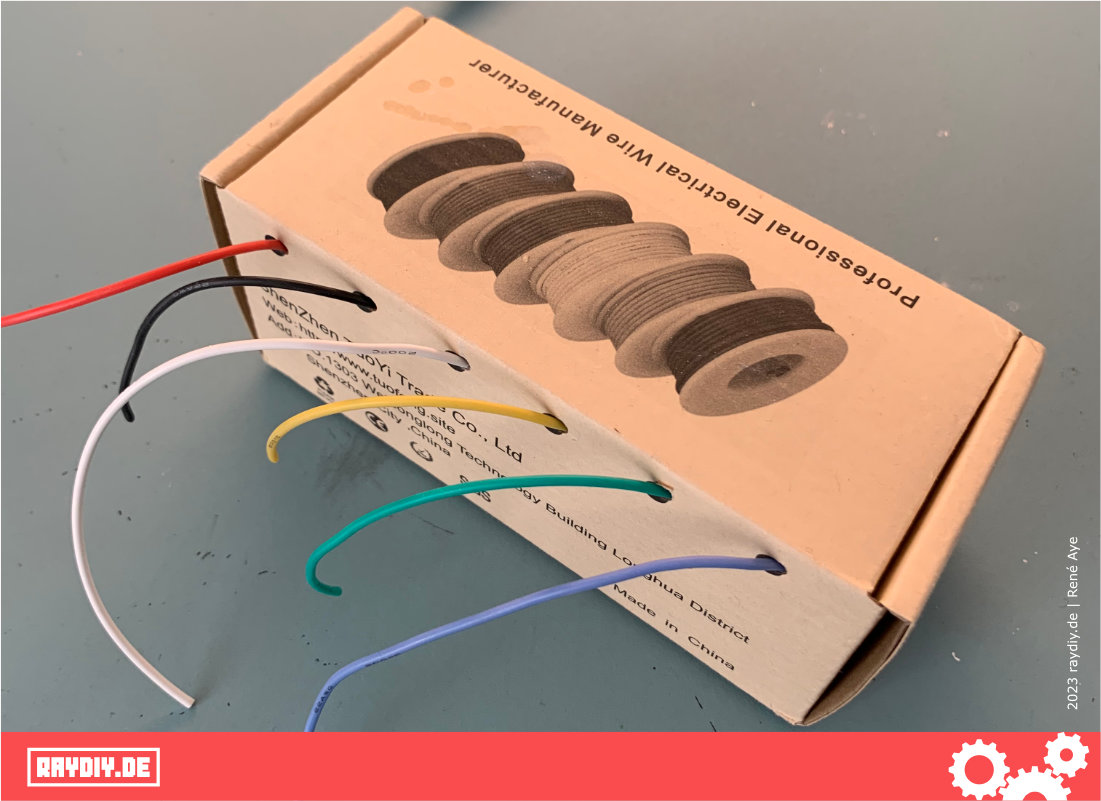
I use such silicone strands with the thickness AWG 22 or 0.32 mm² cross-section. They are a bit thicker than the standard jumper cables, but you can still work with them. And silicone is not as heat-sensitive as other types of plastic – if you ever come with the soldering iron to it, does not immediately happen a disaster.
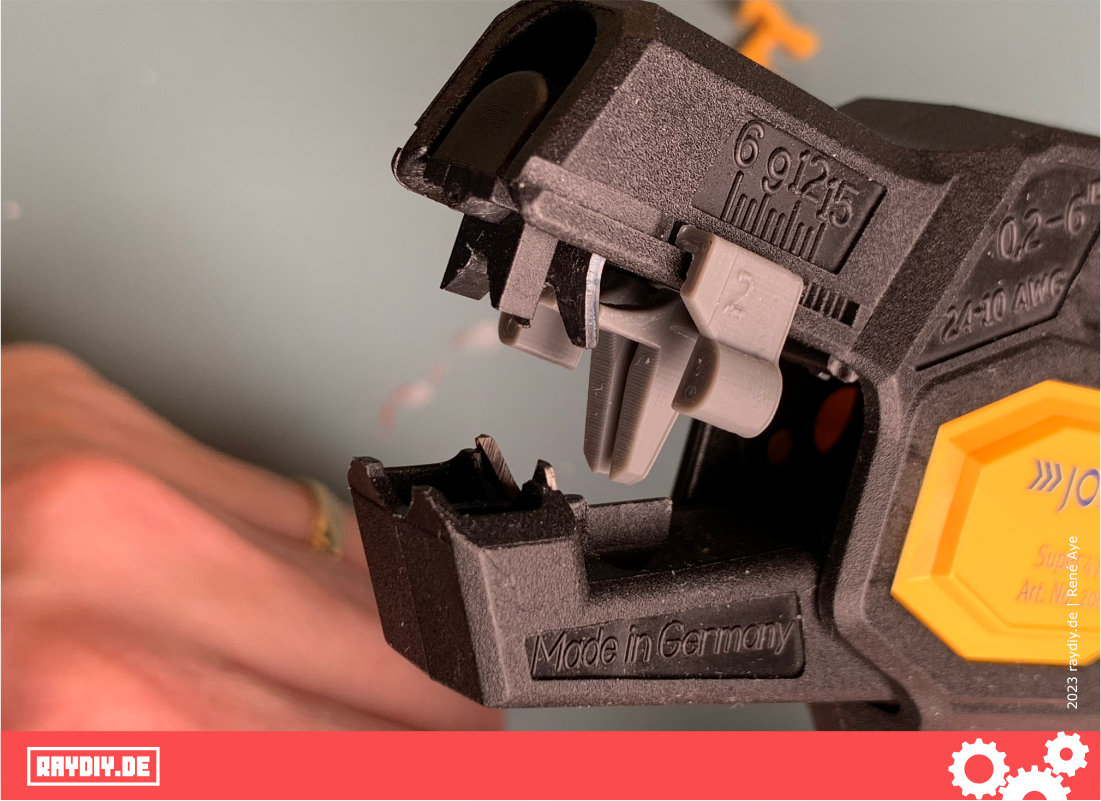
How I Hacked My JOKARI Wire Stripper From 6 mm to 2 mm Stripping Length
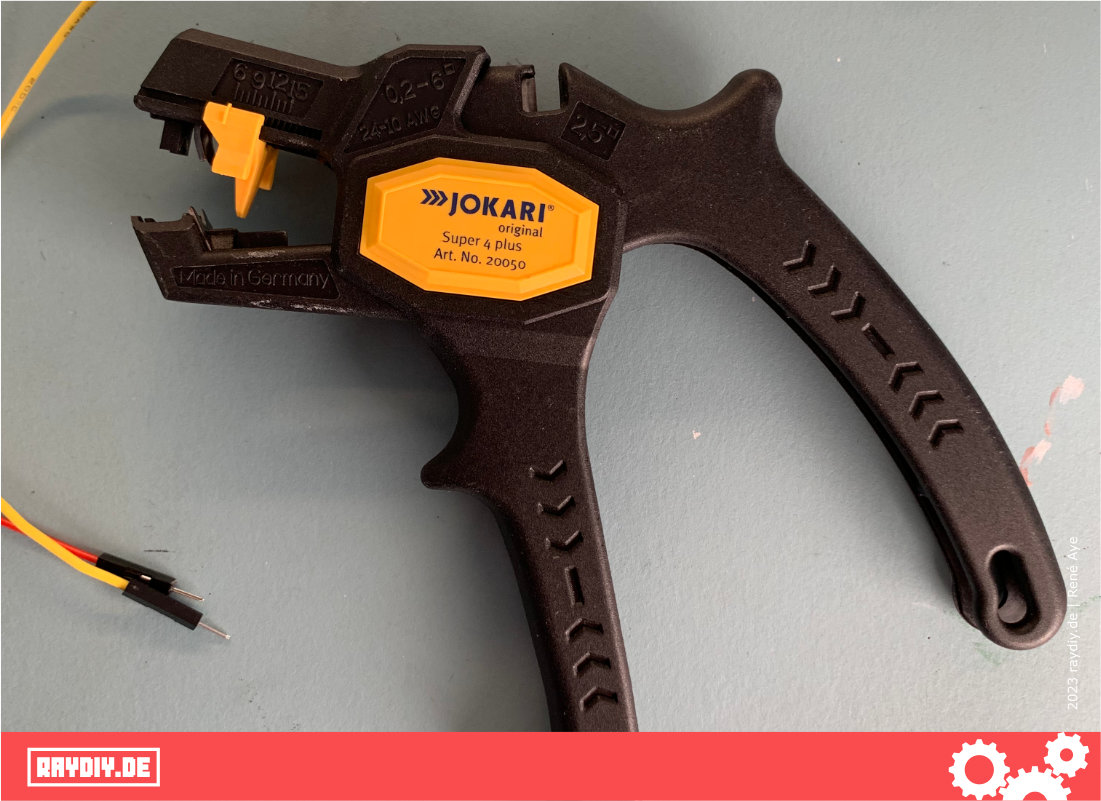
I also have to say something about the stripping pliers: I have been using this automatic wire stripper from the JOKARI company for years. A German family business whose roots go back to an electrical and hi-fi business founded in 1949 by the Krampe couple.
Found this info kinda likeable 🙂
But seriously: their sense of sustainability and their work in terms of inclusion and school projects have impressed me. In addition, the products have a good price-performance ratio. More from companies like this, please.
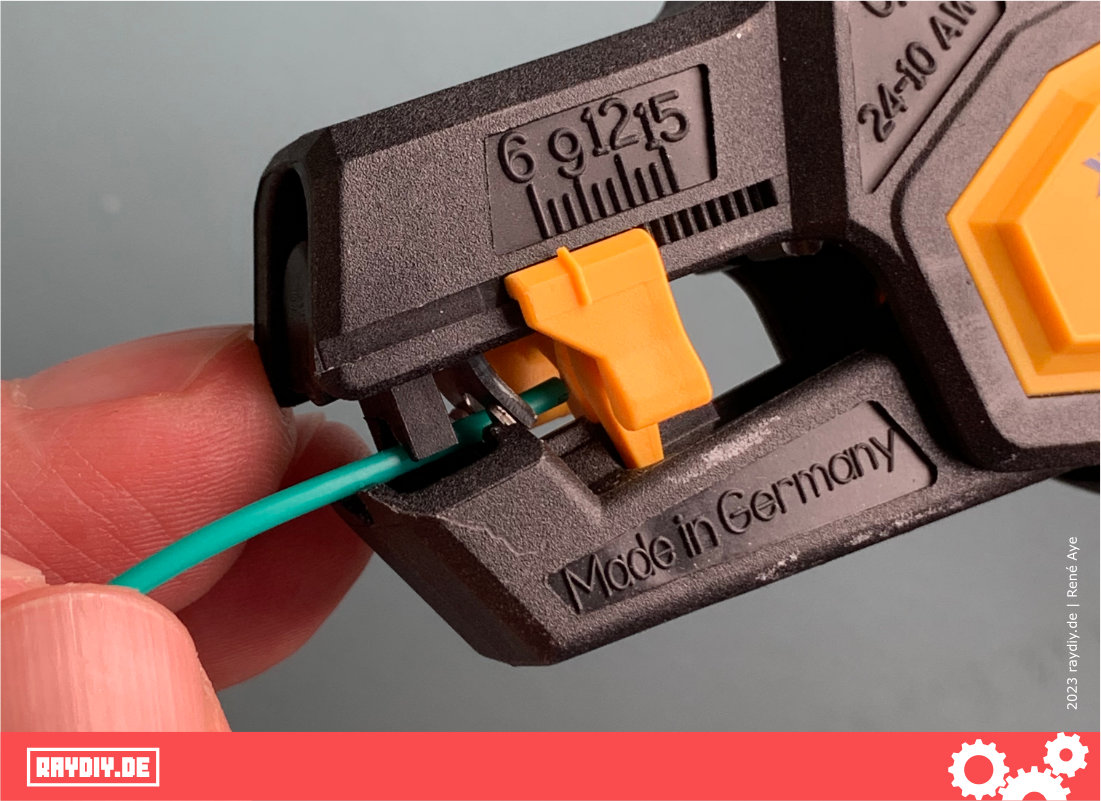
What has always bothered me about these pliers, though – they have a length stop that can only be adjusted down to 6 mm. For the electrician who lays the home electrical system is certainly optimal.
For my electronics tinkering, however, I usually need less length. I know there are other tools, but among the automatic wire strippers I have found nothing. Besides, I already have such a pliers, and that works great.
So I took a closer look at the pliers and especially the length stop. The length stop can be removed very easily. So I designed a new length stop and printed it out in the 3D printer – it works! Now I can strip my strands with the pliers down to 2 mm.
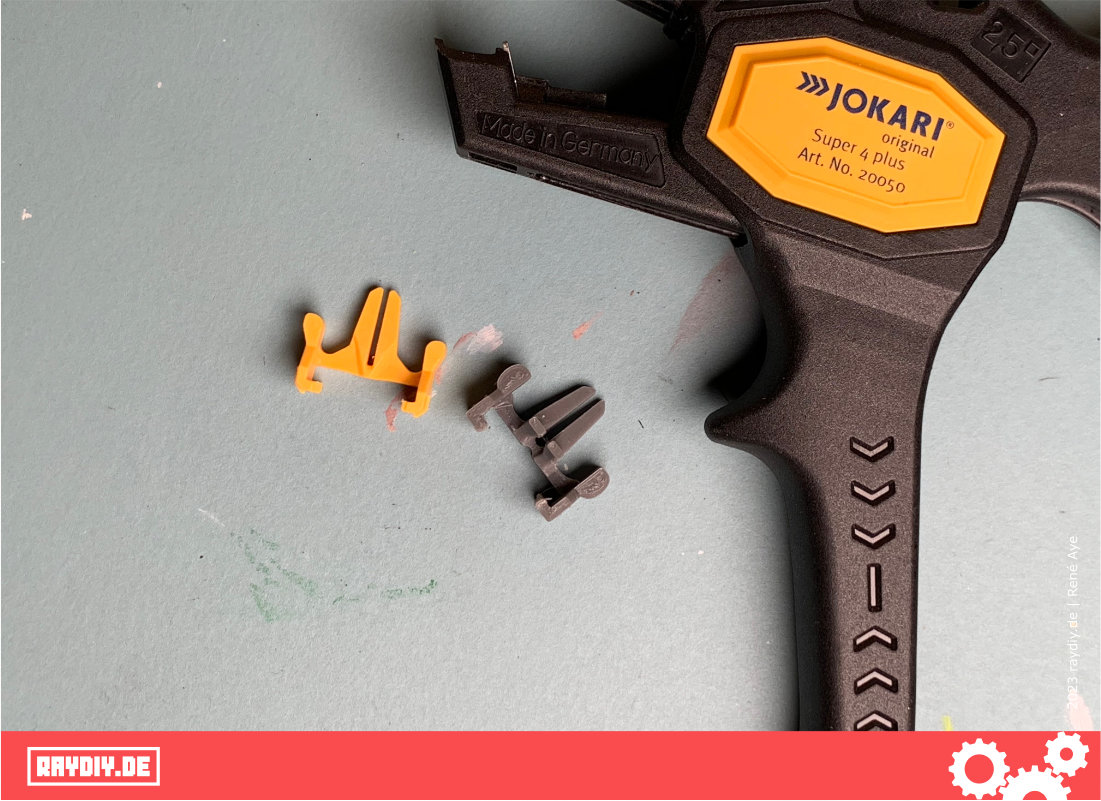
You can download the STL file for this hack directly here.
Which Crimping Pliers I Can Recommend
On the subject of crimping pliers: of course, I first tried the cheap ones from the hardware store checkout section. My tip: let it be. Buy something decent right away and then you’ll have peace of mind.

These crimping pliers are more expensive, but the openings and supports have just the right shape – and I guess it’s all about tenths of a millimeter here for a crimping pliers to work well.
And the crimping pliers from the men’s Quuengel checkout section at the hardware store probably won’t have that precision. Of course, I’ll link you to the good piece.
Crimping Step-by-Step Instructions – A Crimping Tutorial
One more thing to the impatient ones in advance: you have to practice it a few times! After four, five, six times crimping you have the hang of it.
Here we go:
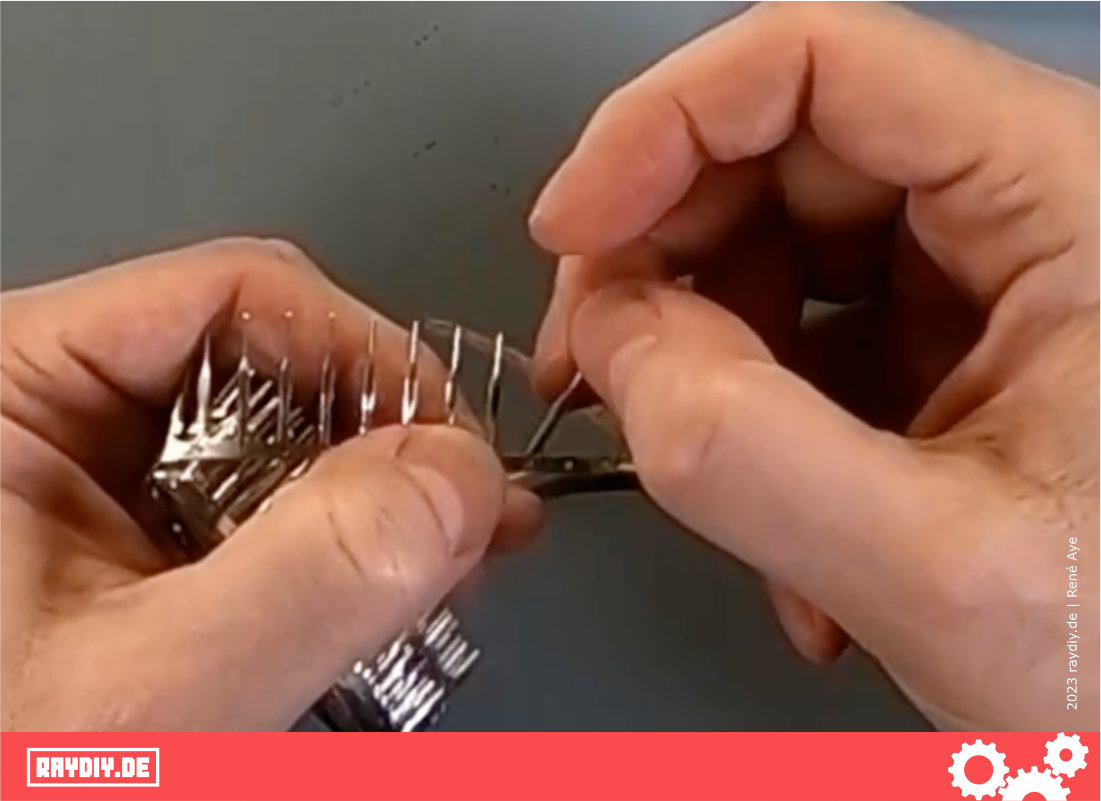
We cut our strand to length as needed.
Then we detach such a DIP from the kit from the metal strip – depending on whether you want to crimp a socket or a plug. And then, of course, the matching connector housing.
I’m not sure if this is really called DIP. But in the following I will continue to use this term throughout.
From the DIP you can see approximately how much of the stranded wire you need to strip.

Here with this Dupont DIP it is about 4 millimeters.
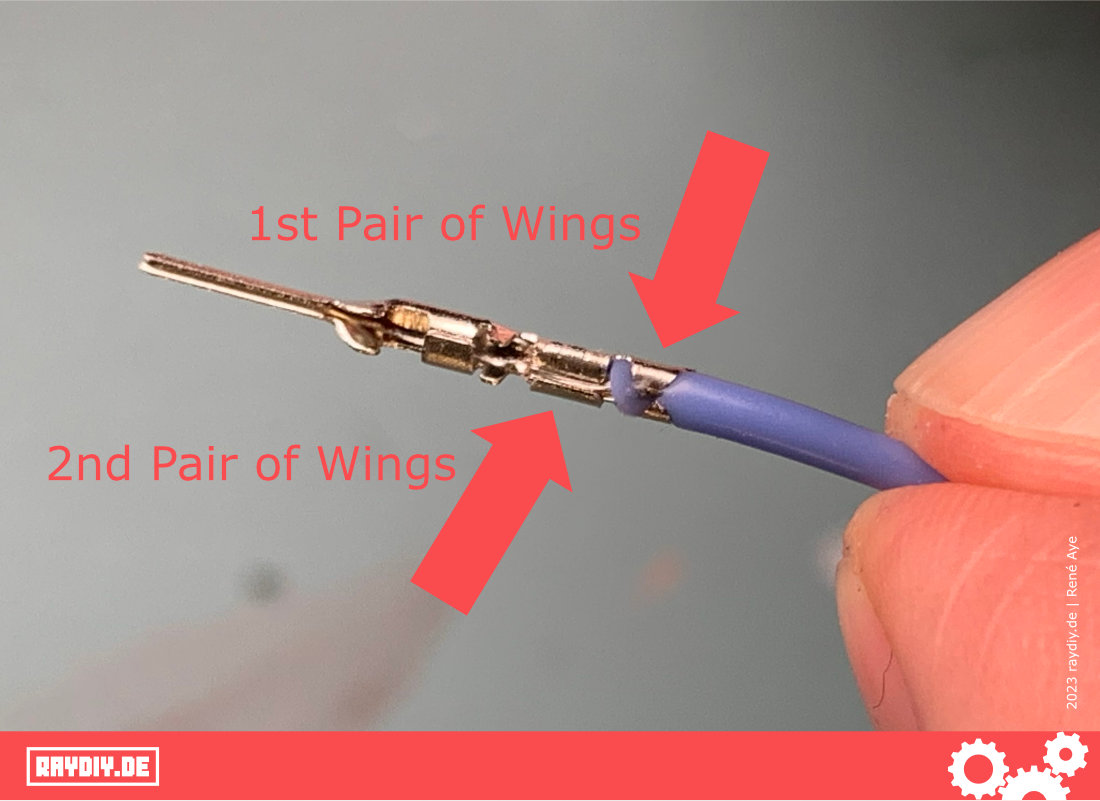
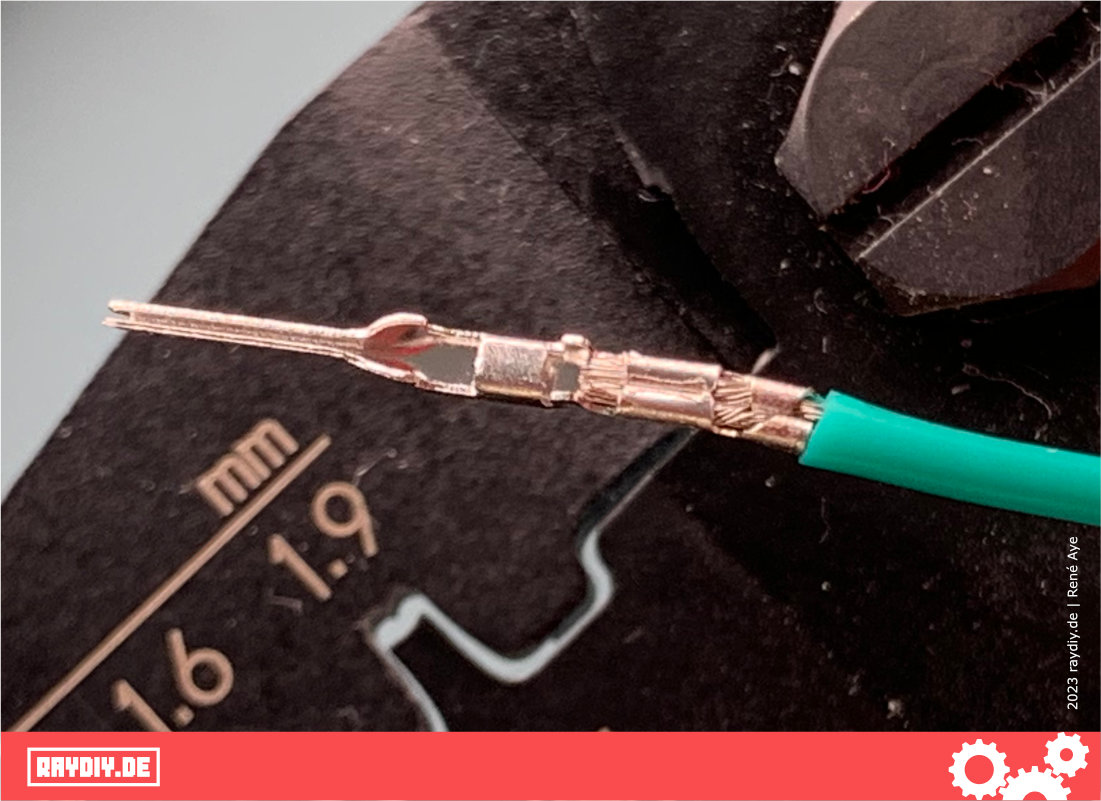
The insulation should end exactly in this first gap after crimping.
The bare wires should end exactly in the second gap.
The first pair of wings encloses the insulation, and the second pair of wings encloses the bare cores.
I do not know if there is the one correct way. The slightly thicker silicone jacket doesn’t necessarily make it easier either. But for me it works quite well as follows:
I remove the silicone jacket – of course, with the hacked wire stripper it is no problem at all 😉

Now I position the strand in the DIP so that the insulation ends in the second opening – not too close to the second pair of wings. Otherwise the insulation will push onto the second pair of wings and then bulge out too much at the top.
Now I press the first two wings together with the tip of the crimping pliers, but only so that they are roughly parallel and the stranded wire is somewhat pinched. This makes it easier to place the whole thing in the next step.
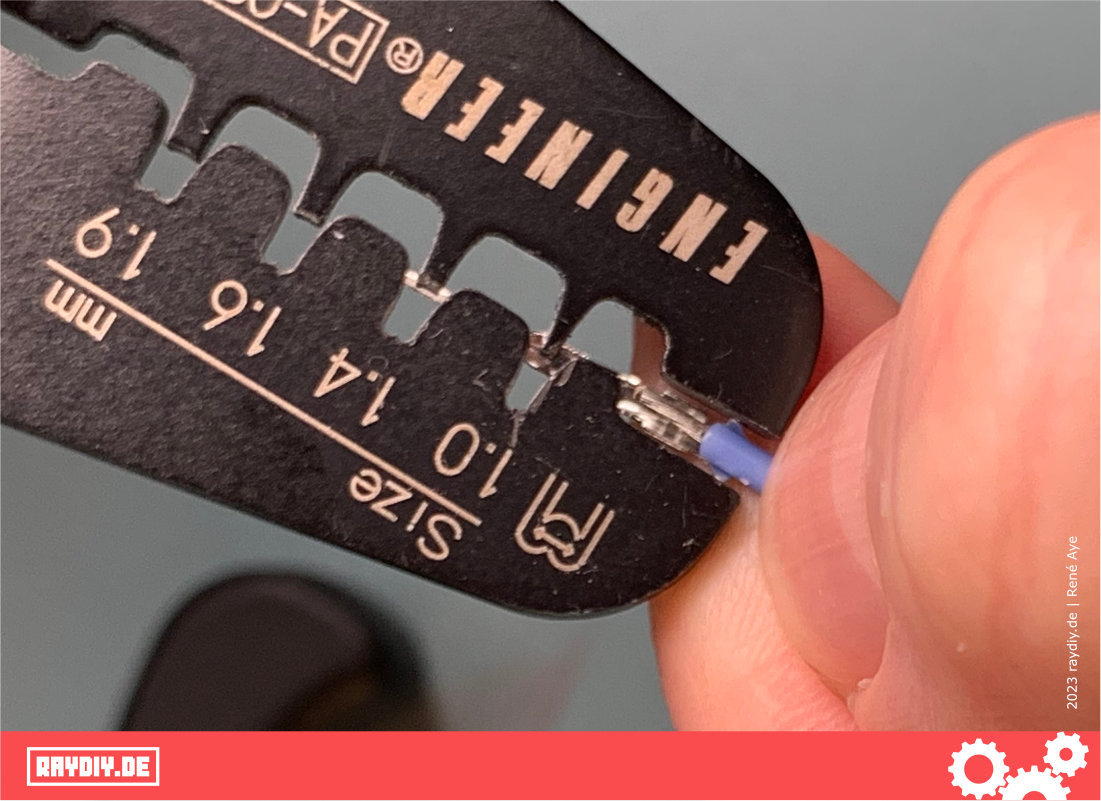
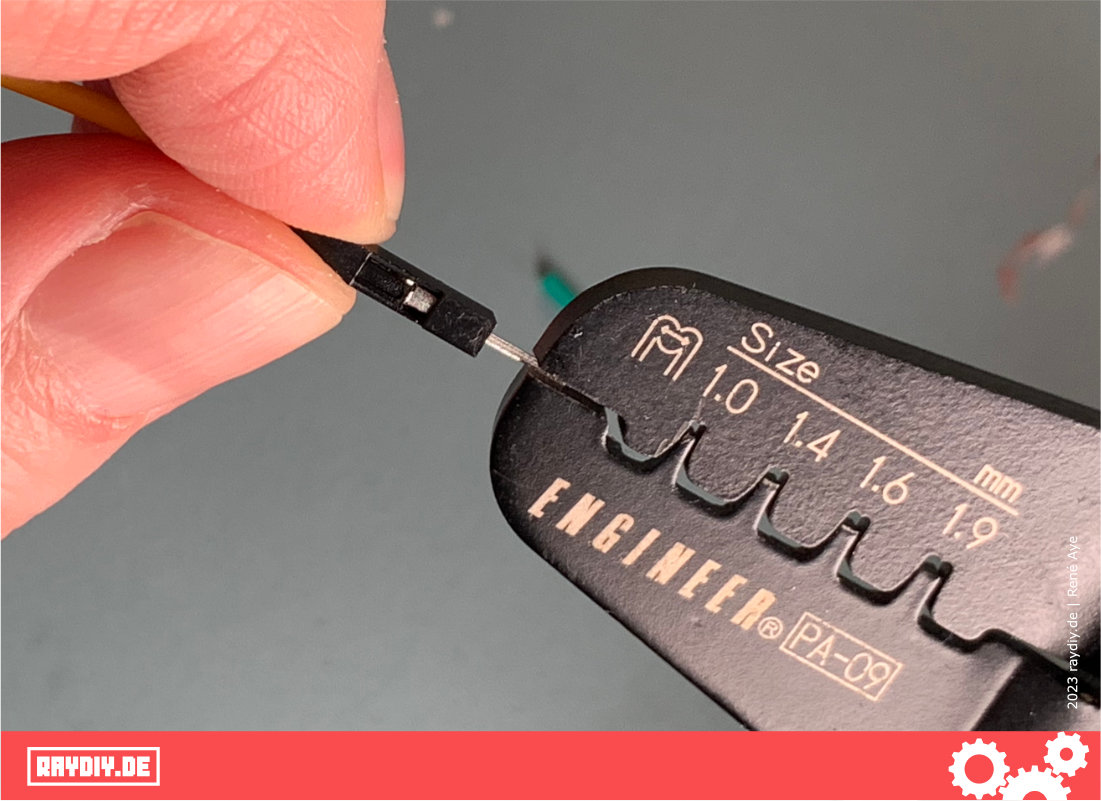
For the next step, I choose the 1.9 mm opening of the crimping pliers for this DIP and this silicone stranded wire. Which opening is the right one depends on the DIP and the cable diameter.
With the 1.6 mm opening, the insulation was too squeezed for me. And if the DIP simply falls off after crimping, then try the smaller opening.
If the DIP is now positioned correctly, you can crimp the first pair of wings.
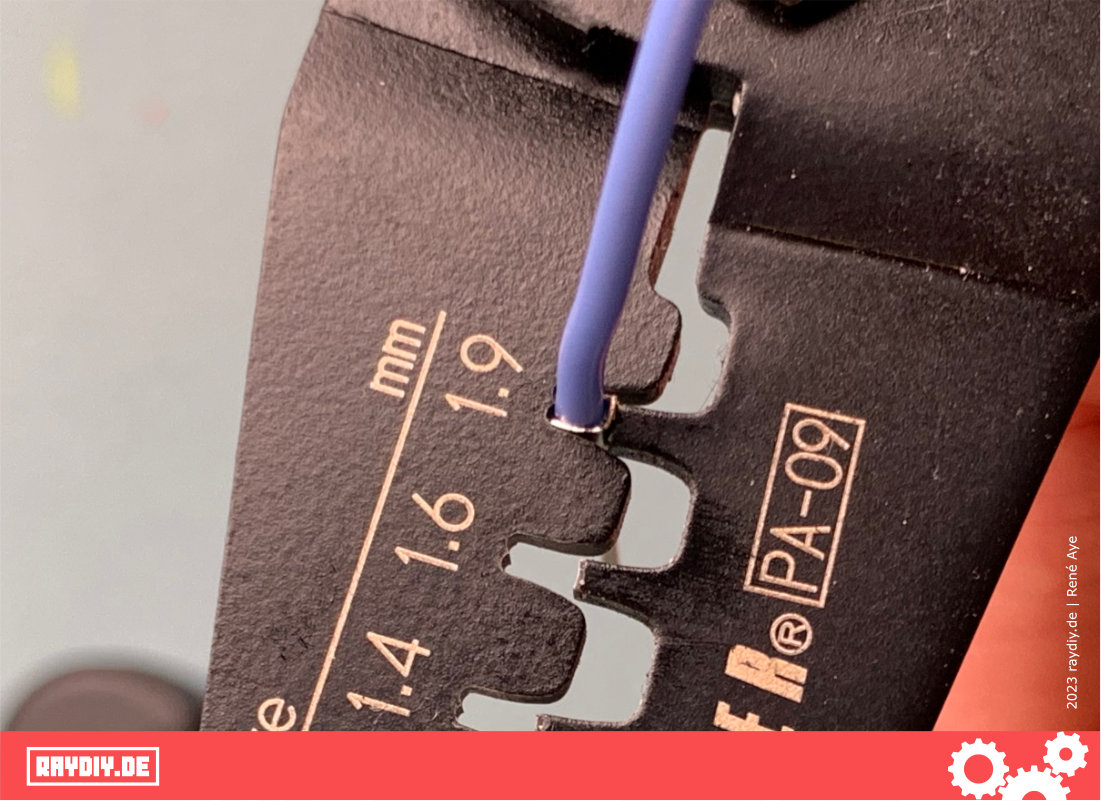

Now loosen the DIP and reposition it so that the second pair of wings can be crimped.
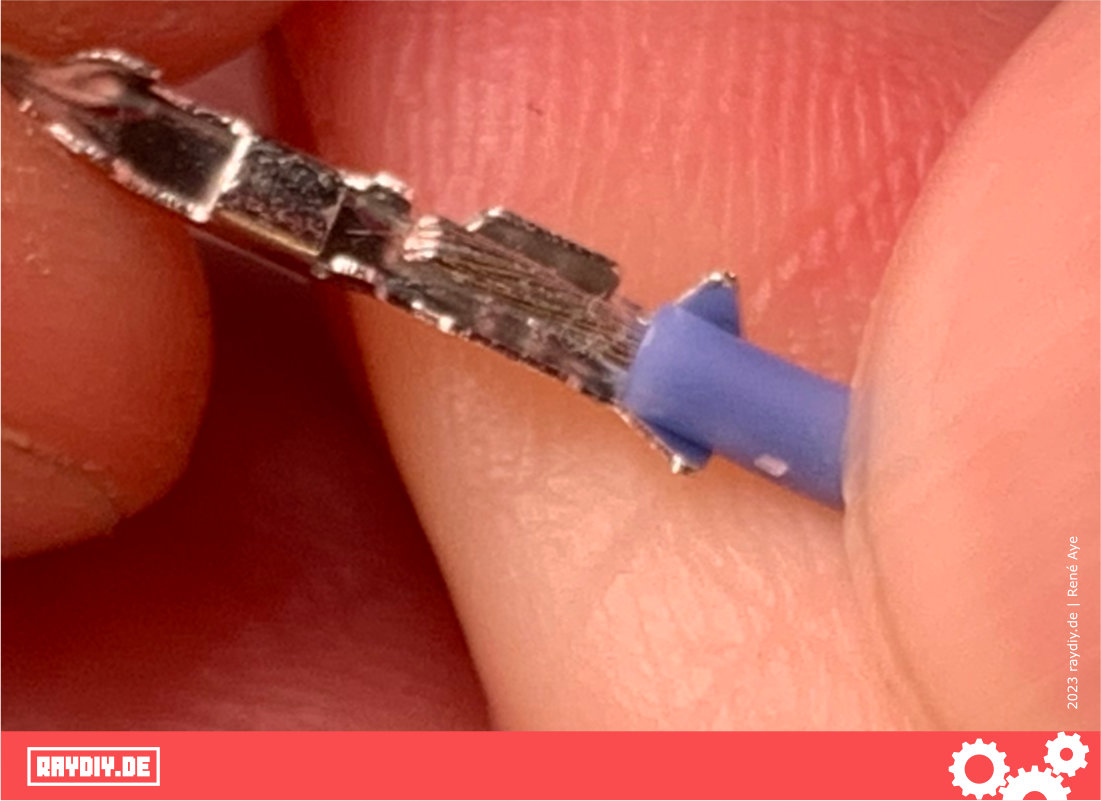
This is what a nice crimping looks like!
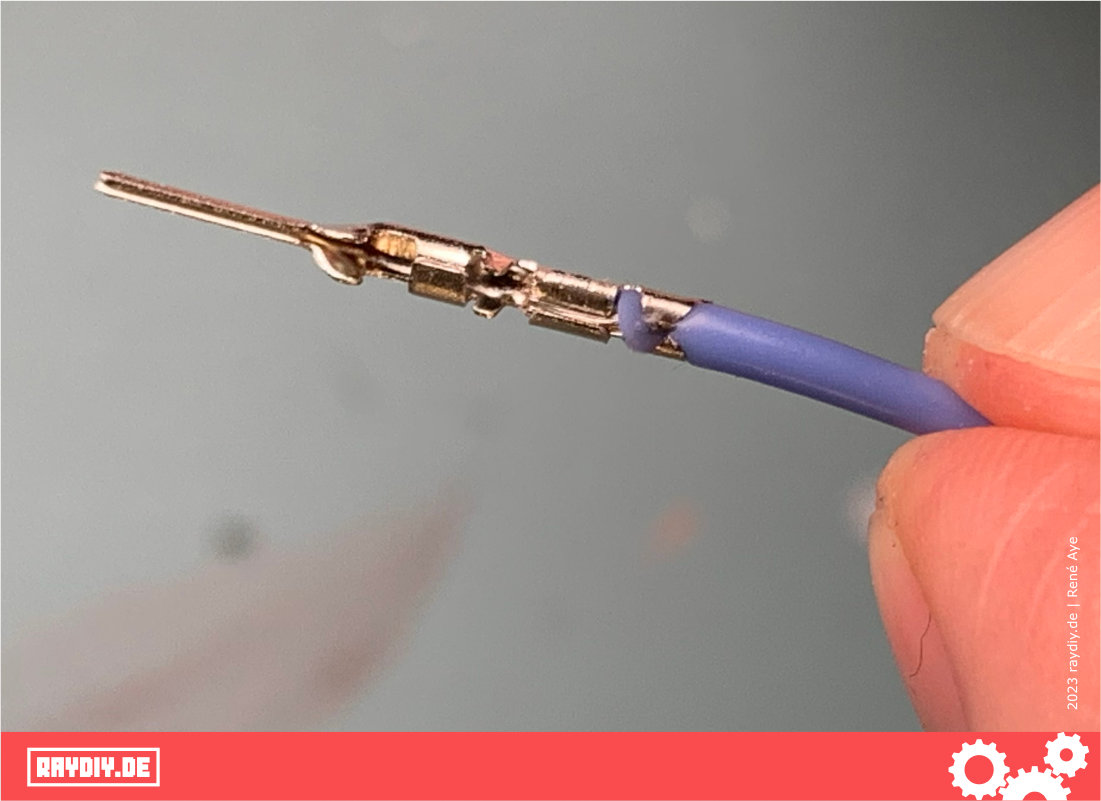
Make sure that the whole DIP is straight and not too much of the insulation is squeezed upwards, otherwise the sleeve cannot be pushed over it.
If necessary, you can use the tip of the crimping pliers to straighten the whole DIP again if it is bent.
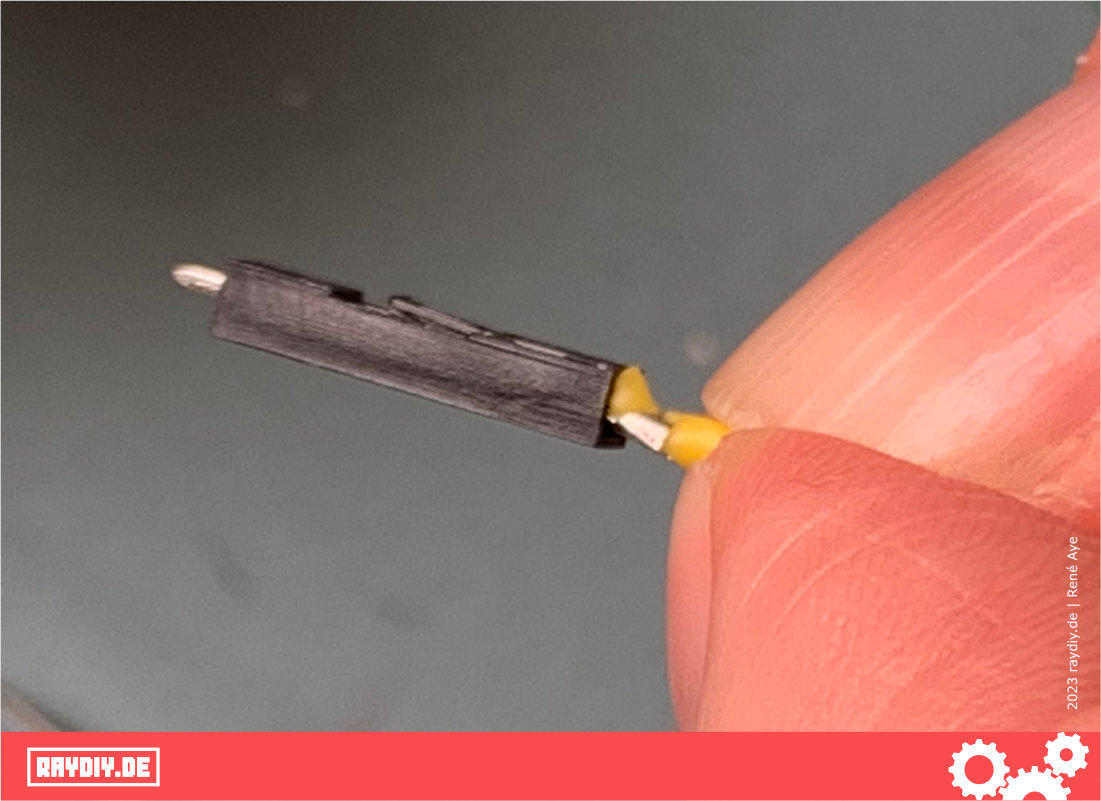
Now push the sleeve over the DIP. With the Dupont plug you can also hear a quiet click. When you hear this, you know you have done it.
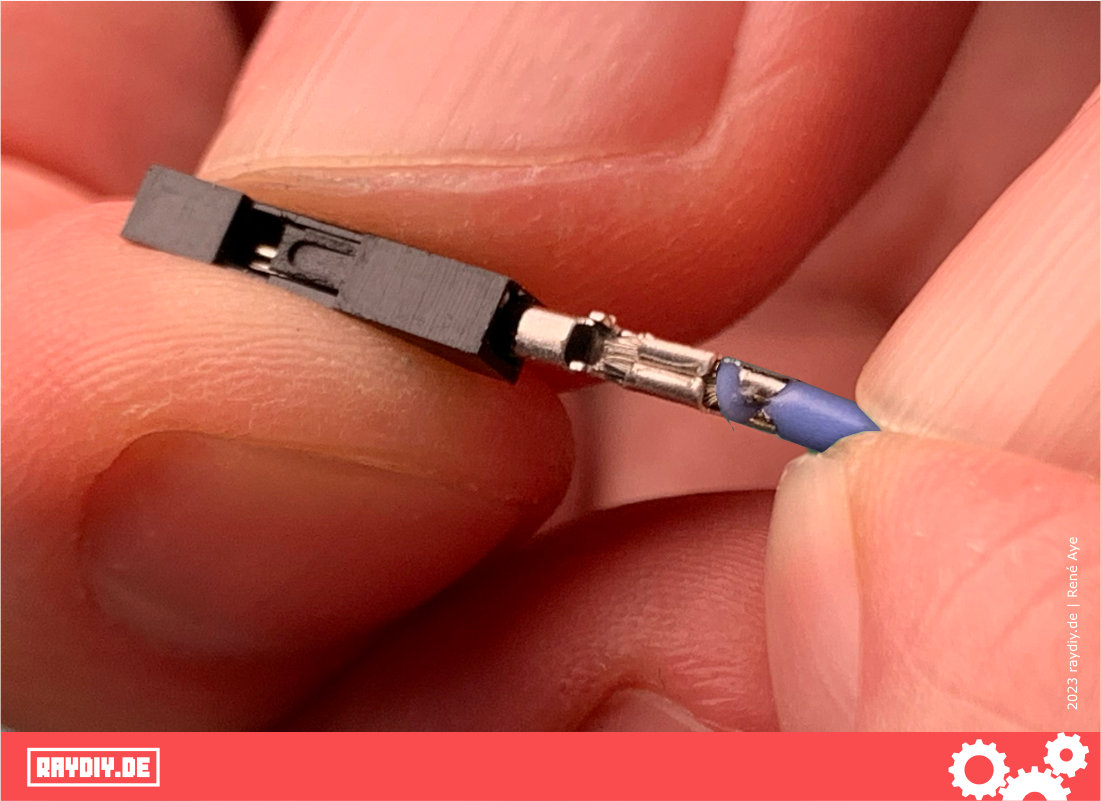
If the sleeve cannot be pushed over it, but the tip of the plug already looks out of the sleeve, you can try to pull it with the crimping pliers.
Sometimes it just hangs. Then I cheat and simply crimp with the next smaller opening of the crimping pliers again. After that, usually nothing more hooks.
By the way: I have seen instructions where the insulation is not crimped in. Especially with the somewhat difficult thicker silicone sheathing could be interesting. The stranded wire is inserted only until the insulation touches the pliers.
In that case, of course, you have to remove some more insulation. With this Dupont DIP, that would be 5 to 6 mm.
I don’t know if that’s correct either. I am not a professional crimper either. In my tests, it has also worked well. However, with the Dupont DIP I then used the 1.6 mm opening of the crimping pliers.
On the net, however, the majority is clearly with the faction that crimps in the insulation as well.
That is basically the whole process. With other connector types, it works the same way in principle. You just have to see how much insulation you need to remove, and which opening of the crimping tool works best.
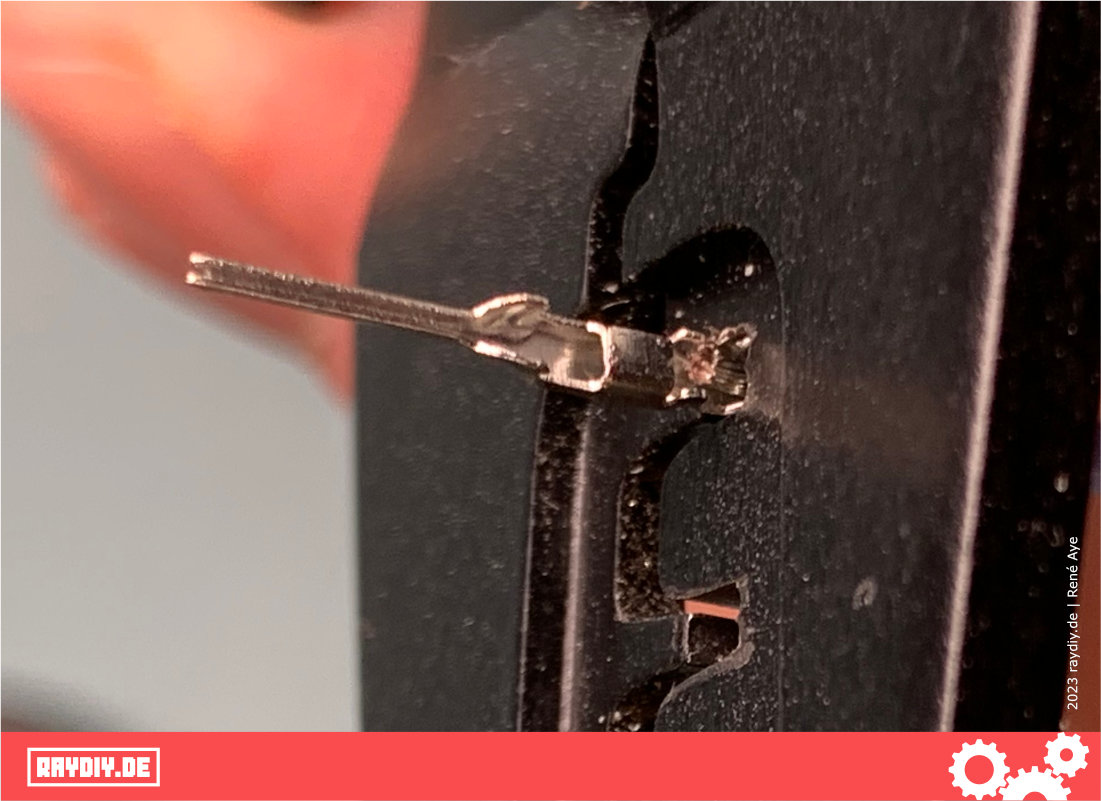
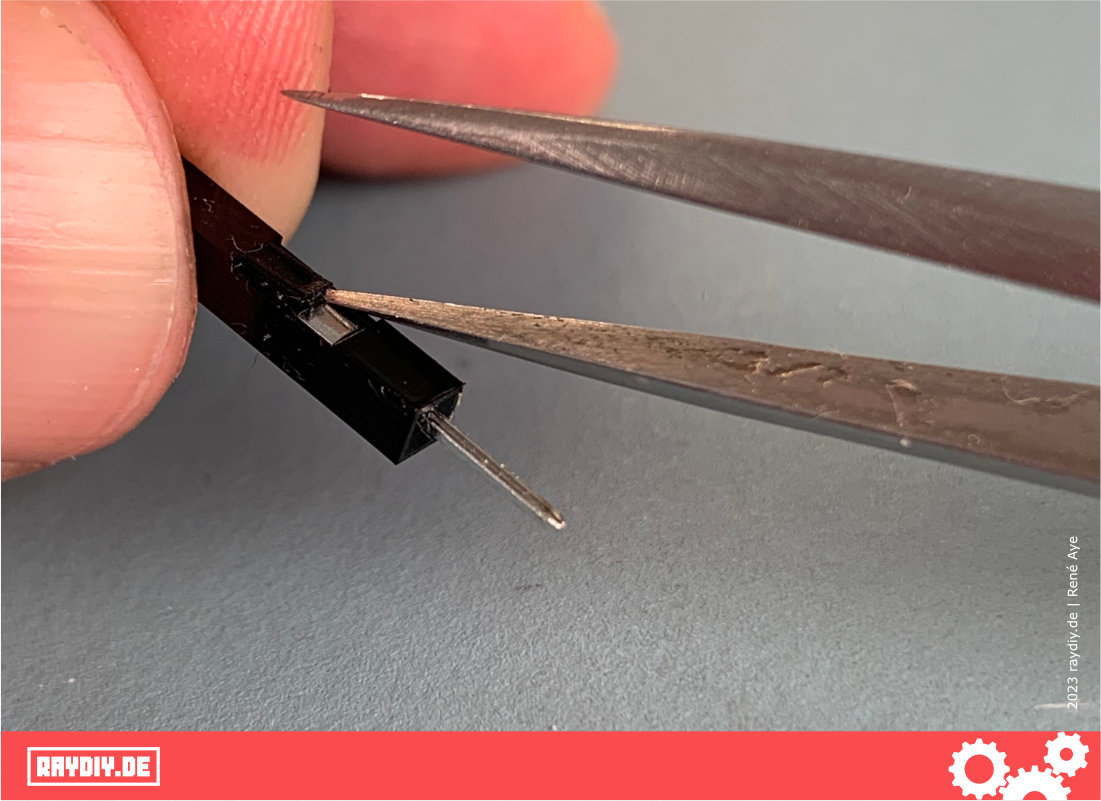
How to Reopen Dupont Connectors
Sometimes you want to reopen a connector. Usually this is possible. You just have to lift the nose that holds the DIP with a pointed object, and then you can pull the cable out of the sleeve again. A bit fiddly, but it works.
Outro
BAM!
Now you should be able to crimp your own jumper cables. Finally you always have the right cable at hand.
And don’t throw in the towel if you don’t get it right the first time. As I said – you have to practice a bit.
New skill achieved! Phew. Now for a coffee.
Links
Product recommendations and the JOKARI hack from this article and video:
- [amazon link=”B002AVVO7K” title=”Crimping Pliers”]
- [amazon link=”B002BDNL4Q” title=”JOKARI Wire Stripper Super 4 Plus”]
- [amazon link=”B07G72DRKC” title=”Silicon Wire AWG 22″]
- [amazon link=”B01EQGNZ2I” title=”JST XH Connector Kit”]
- [amazon link=”B09NBT7D9P” title=”Dupont Stecker Sortiment”]
- JOKARI Wire Stripper Hack (STL File)